Chocolate making 101
A concise overview of how to make Dark “bean to bar” chocolate.
The information below will offer beginners the basics of what you need to make homemade dark chocolate from scratch using a wet grinder (AKA melanger, I will use these terms interchangeably)
Aside from the wet grinder, most of the equipment you will already have at home. This is a practical approach to making bean to bar craft chocolate.
If you want one-on-one help in the comfort of your home, feel free to book a live online tutoring session! It’s affordable, and the next best thing to taking a class in person.

Equipment
Below is a long list of equipment you may want to use making chocolate at home. There is more equipment listed here than you will actually require. However, I have added alternative tools that some of you want to adapt your method to.
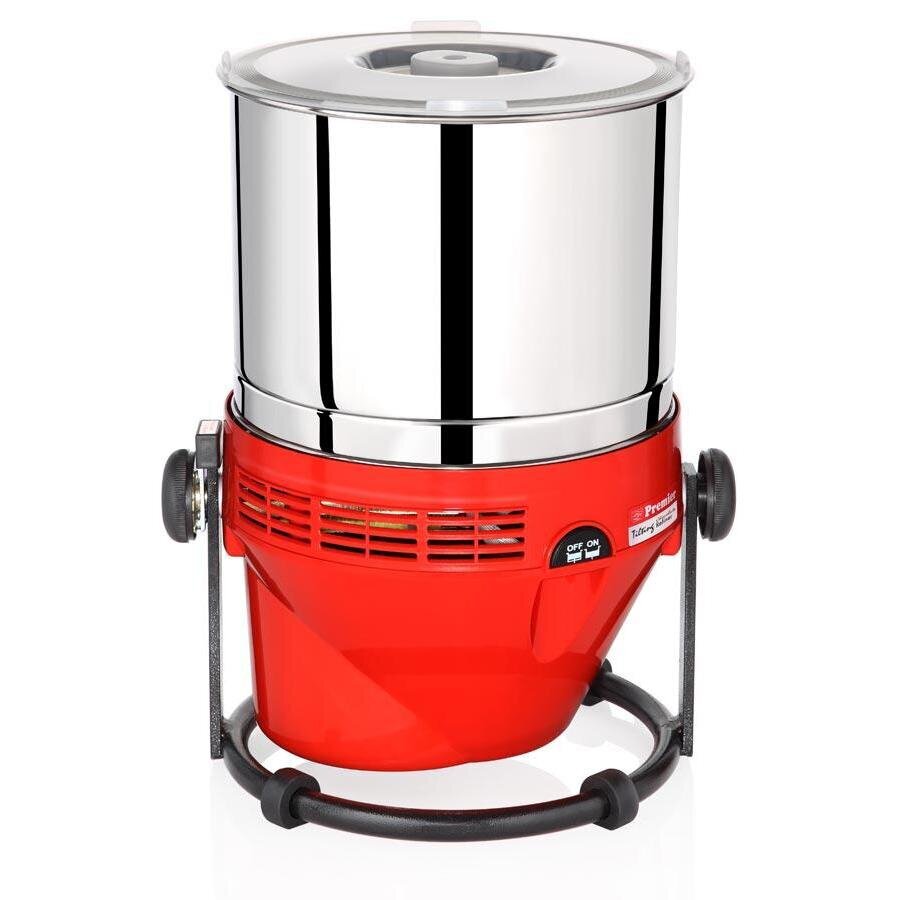
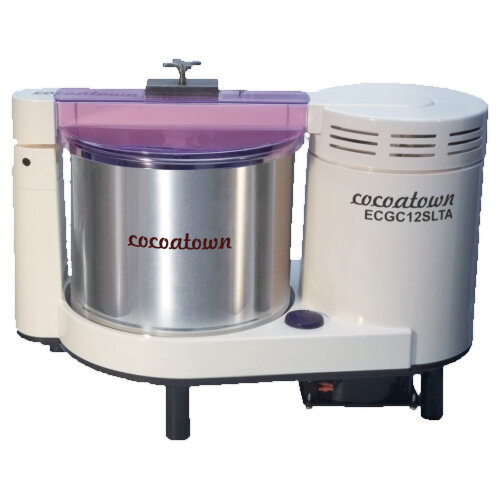
A wet grinder
This is also known as a chocolate refiner or melanger. This is the magic tool you need to turn your cocoa beans into chocolate, without having to slave over a mortar and pestle for 300 hours.
A beginner tabletop wet grinder will cost you roughly $300 USD. Not a huge investment if you compare it to a KitchenAid mixer, high end food processor, juicers, and other kitchen appliances.
The two images here depict wet grinders from two different manufacturers in the USA that I have used. For other equipment manufactures (including wet grinders as well as winnowers, tempering machines, and more) in other parts of the world, check out the Bean To Bar World Map and look under “equipment manufacturers” represented by the dark red pins.
Other Grinders
There really is no other way to make smooth tasty chocolate without a wet grinder. That said, below are a few other kitchen tools you can test out to grind your beans into a paste, however, this is not really chocolate in the true sense as we know it today.
Grinding the beans into a paste is only the first step. None of the following tools will develop the flavour of your chocolate, but merely turn it into a paste. You will never achieve the same refinement and development of flavour without grinding for 24-72 hours with a wet grinder. That said, the following tools are a fun way to play around with making a more rustic, unrefined chocolate. For more information on grinding, see the “refining” stage below.
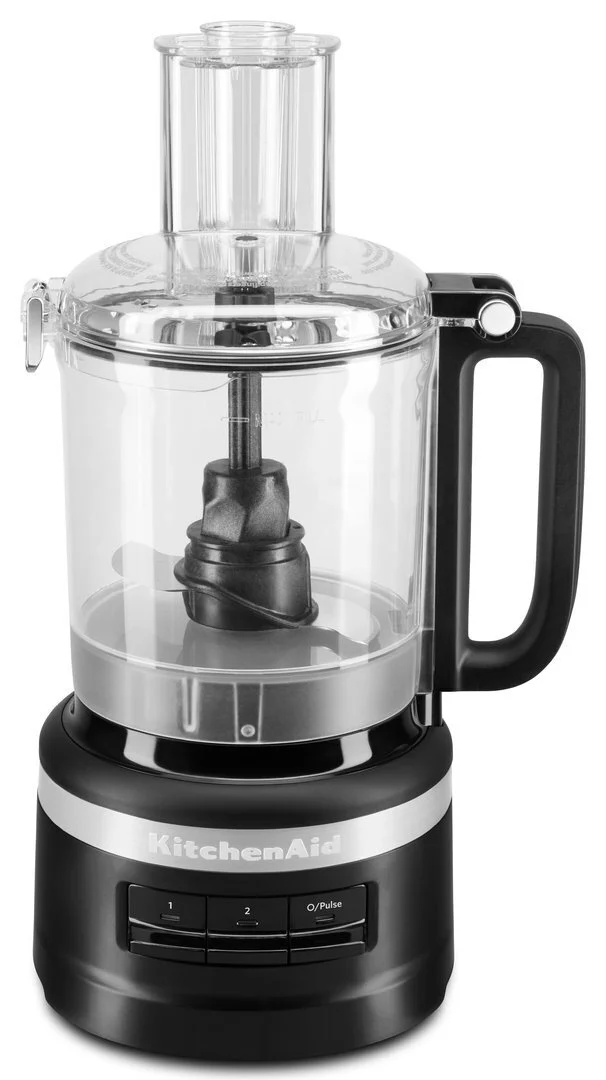
Food Processor
You may attempt to use a food processor, but it only creates a course paste at best. Nonetheless, if you have some cacao beans, it can be fun to play around with them if all you have is a food processor.
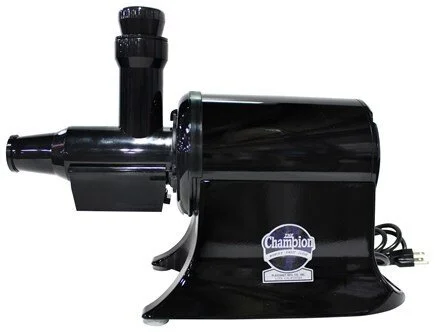
Juicer
Using a juicer, such as the champion juicer, is another way to turn your cacao nibs into a paste, and will create a smoother paste than the food processor. Again, it will not develop the flavour of the chocolate as a wet grinder will.
You may even use this to crack your cacao with a DIY winnower, or to pre-grind your nibs if you plan to use a wet-grinder/melanger.

Mortar & Pestle
If you want to really old-school it, you can use one of these to grind your cacao and sugar. Ensure your mortar and nibs are warm, and grind away!
This is similar to a metate used by Mesomericans and Europeans during most of chocolate’s history.

Tabletop drum coffee roaster
A coffee roaster or trays for roasting
The most convenient way for beginners is to use an oven or convection oven and some metal trays. However, it requires you to periodically rotate the trays and beans to get an even roast.
You can also use a tabletop coffee bean drum roaster. A small one may cost around $300-400 USD, but you can set the temperature and time and leave them be until the beans are ready.

Infrared Laser Thermometer
Infrared laser thermometer
A laser thermometer takes an immediate and accurate surface temperature of the cacao beans. This is helpful if you are roasting in the oven and want to know when the cacao beans have reached a specific temperature.
It’s also helpful for tempering, more so than a digital stick thermometer since it’s more immediate and accurate.
They can range in price form $30 to over $100. You can purchase them online or at a hardware store.
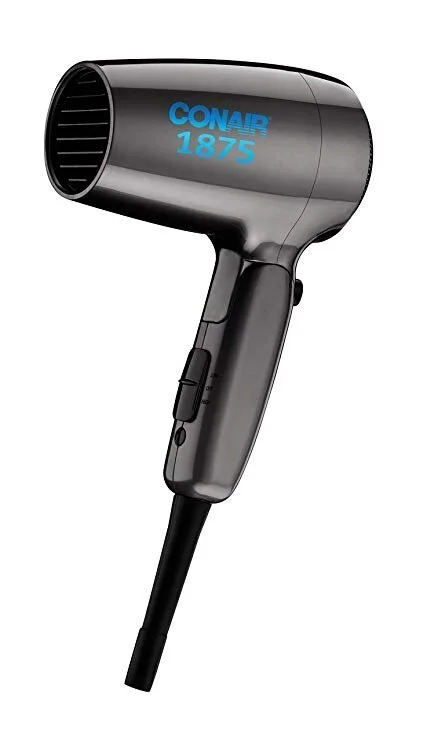
Hairdryer
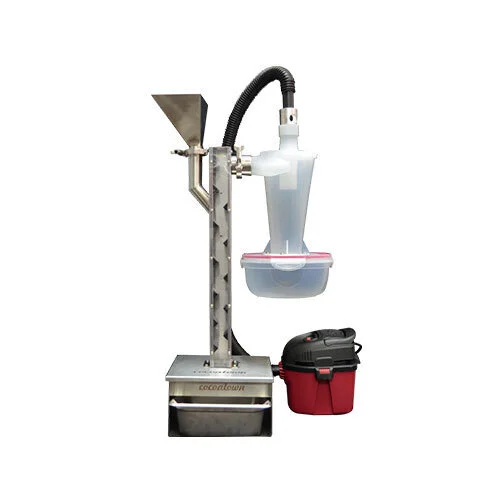
CocoaTown Winnower
A winnower or hair dryer/Rolling Pin
After you roast your cacao beans, you will need to crack them and remove the husk (the thin shell around them).
The cheapest and easiest way to do this is cracking them with a rolling pin, and using a large wide bowl and hair dryer to blow the husk away.
If you want an easier and more efficient (yet more expensive) method, you can buy a winnower which cracks the beans and removes the husks all in a compact and quick manner.
There are also some DIY or homemade winnowing machines out there that just require a vacuum, pvc pipes and a bucket. Use a search engine to search “DIY cocoa bean winnower” and you should see a list of websites, blogs, or youtube videos on making your own winnower.

Metal Bowls
You will require various sized metal bowls for many tasks such as winnowing, tempering, and storing.
For winnowing, using a large wide rim and shallow bowl is helpful. For tempering, a more narrow/deeper bowl is helpful.


Scrapers & Spatulas
These are some must-haves for any chocolate maker. The scrapers are perfect for tempering chocolate on a granite/marble slab. They also work well for scraping molds when forming bars or making chocolate bonbons.
Scrapers can be purchased from cooking/chocolate supply shops, or even from your local hardware store usually located in the drywall equipment area.
The spatulas are necessary for everything from scraping down the refiner, tempering, and making ganaches.

A fine mesh strainer
After refining, there will always be little bits of nibs or sugar crystals that were stuck to the equipment and will need to be strained out of your chocolate.
The strainer is also a good way to remove any residual dust/cacao husk dust after winnowing, or straining your ganaches.
Try to find a size that will match your bowl. It’s helpful if the strainer can rest on the bowl while you pour the chocolate through.

Kitchen grade cambro with lid.

Deep metal hotel pan.
reusable containers or bags
You will also need some reusable containers and/or bags for your cacao beans/nibs and chocolate. The best way to store chocolate and limit flavour degradation is sealing it in an airtight container, glass or plastic.
Glass mason type jars are best for storing your cacao and chocolate. Glass won’t absorb odours from previous ingredients. However, they are not very practical depending on how much chocolate you are making/storing.
Plastic kitchen grade cambros are most practical, and come in various sizes. Make sure you wash them well before using, and ensure they are odour free (not odours left behind from previously stored ingredients.
If you don’t like using plastic, you can use deep metal hotel pans. The lids don’t really seal the rim, so you may have to use plastic wrap to place over the pan before placing the lid on top.
You can also use butchers paper to wrap blocks of already made chocolate as well, and keep them in a low-humidity, odour free room.
Plastic resealable bags are another option, but not as good as cambros. Try purchasing the more durable grades with thicker plastic, such as freezer grade or thicker industrial/kitchen grade bags.
Ingredients
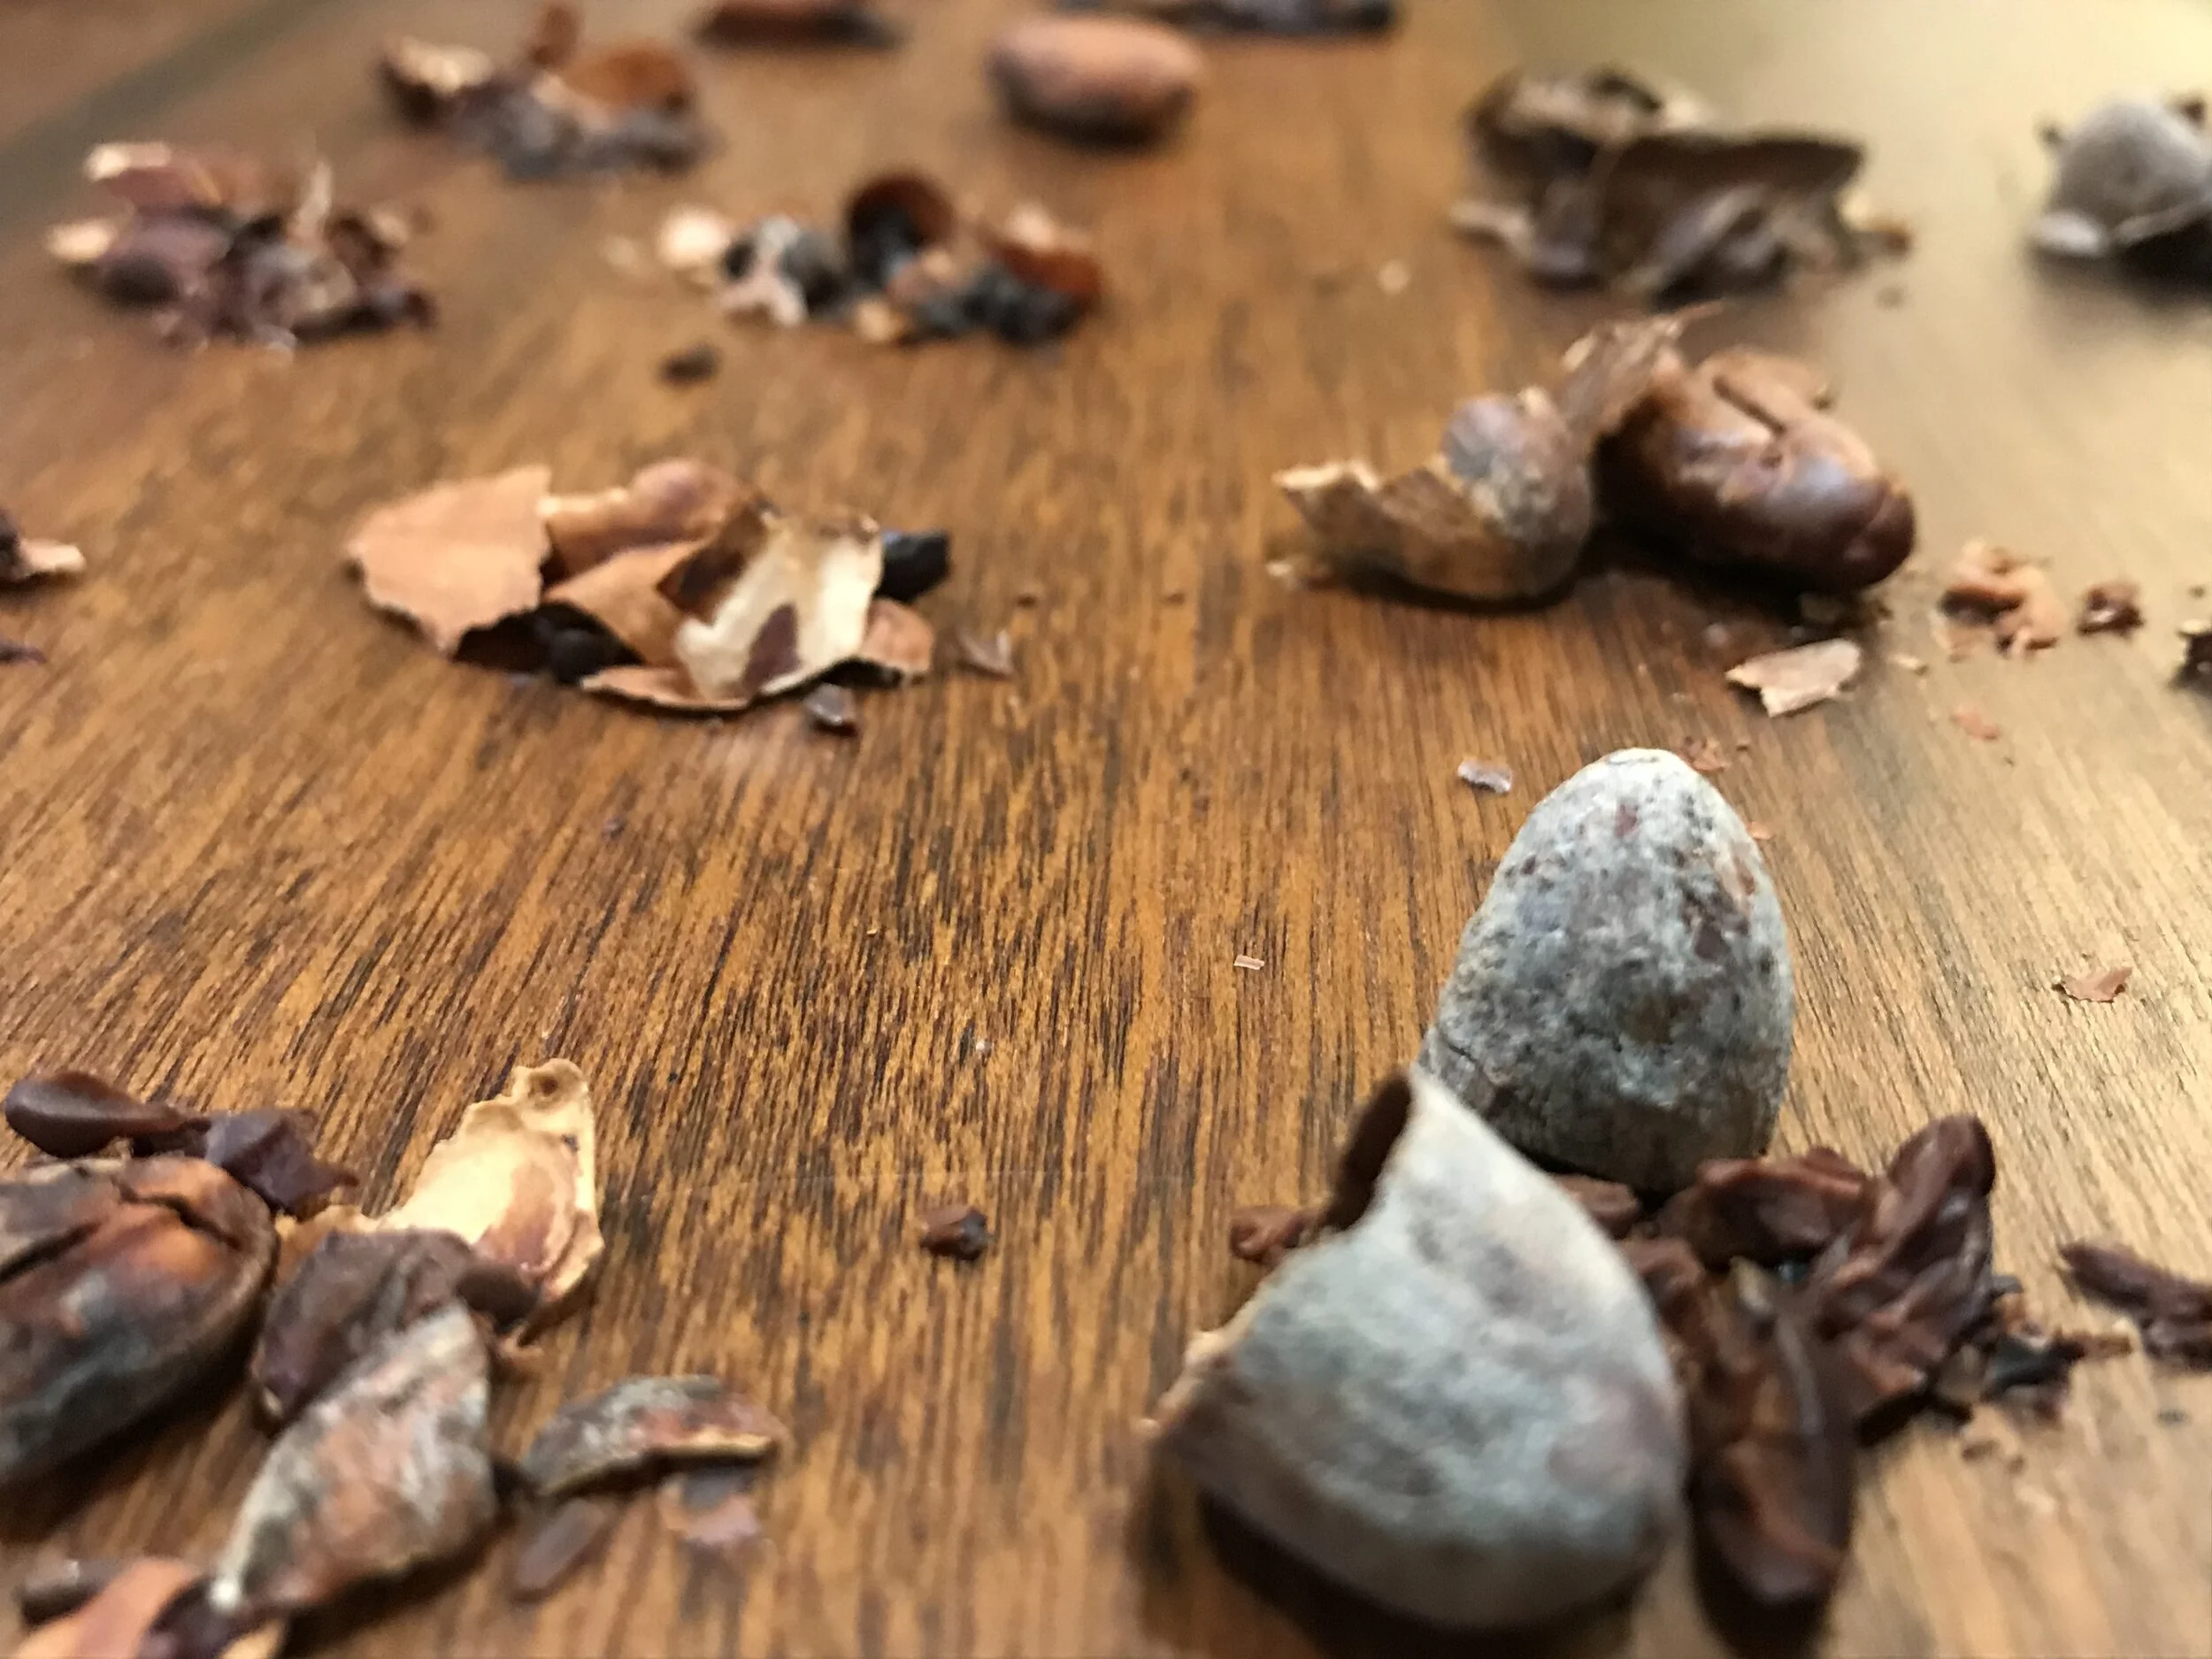
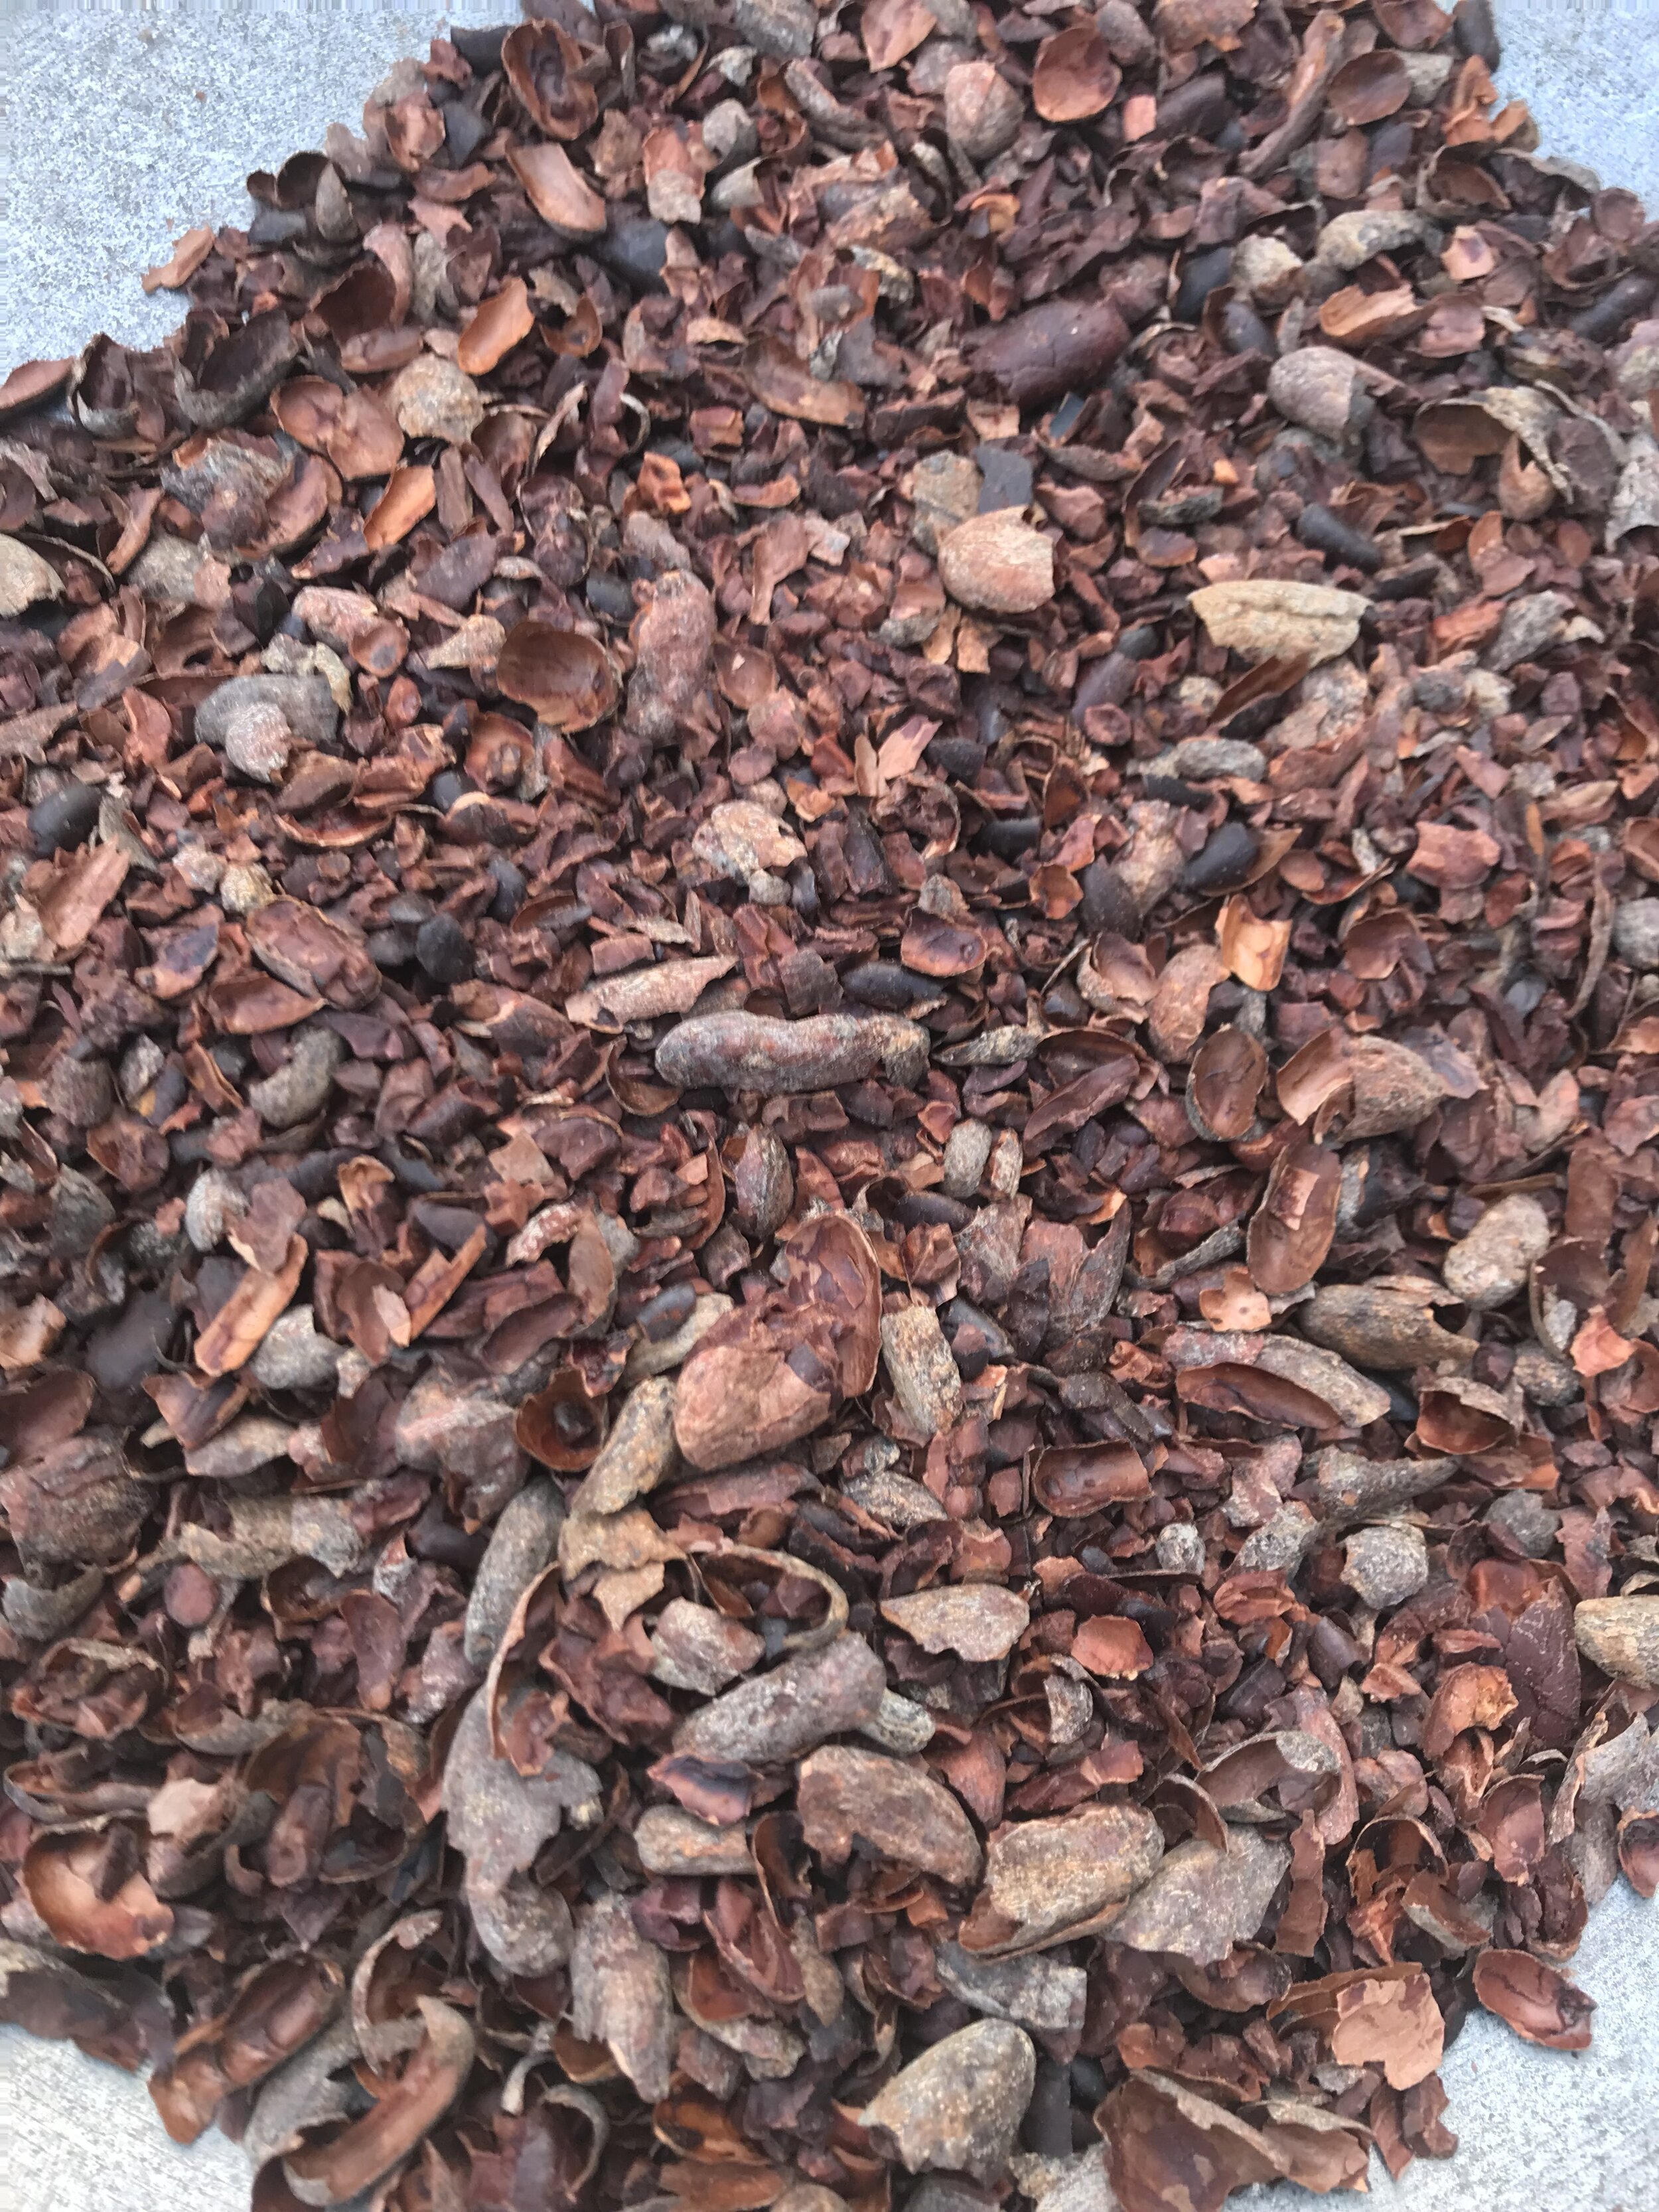
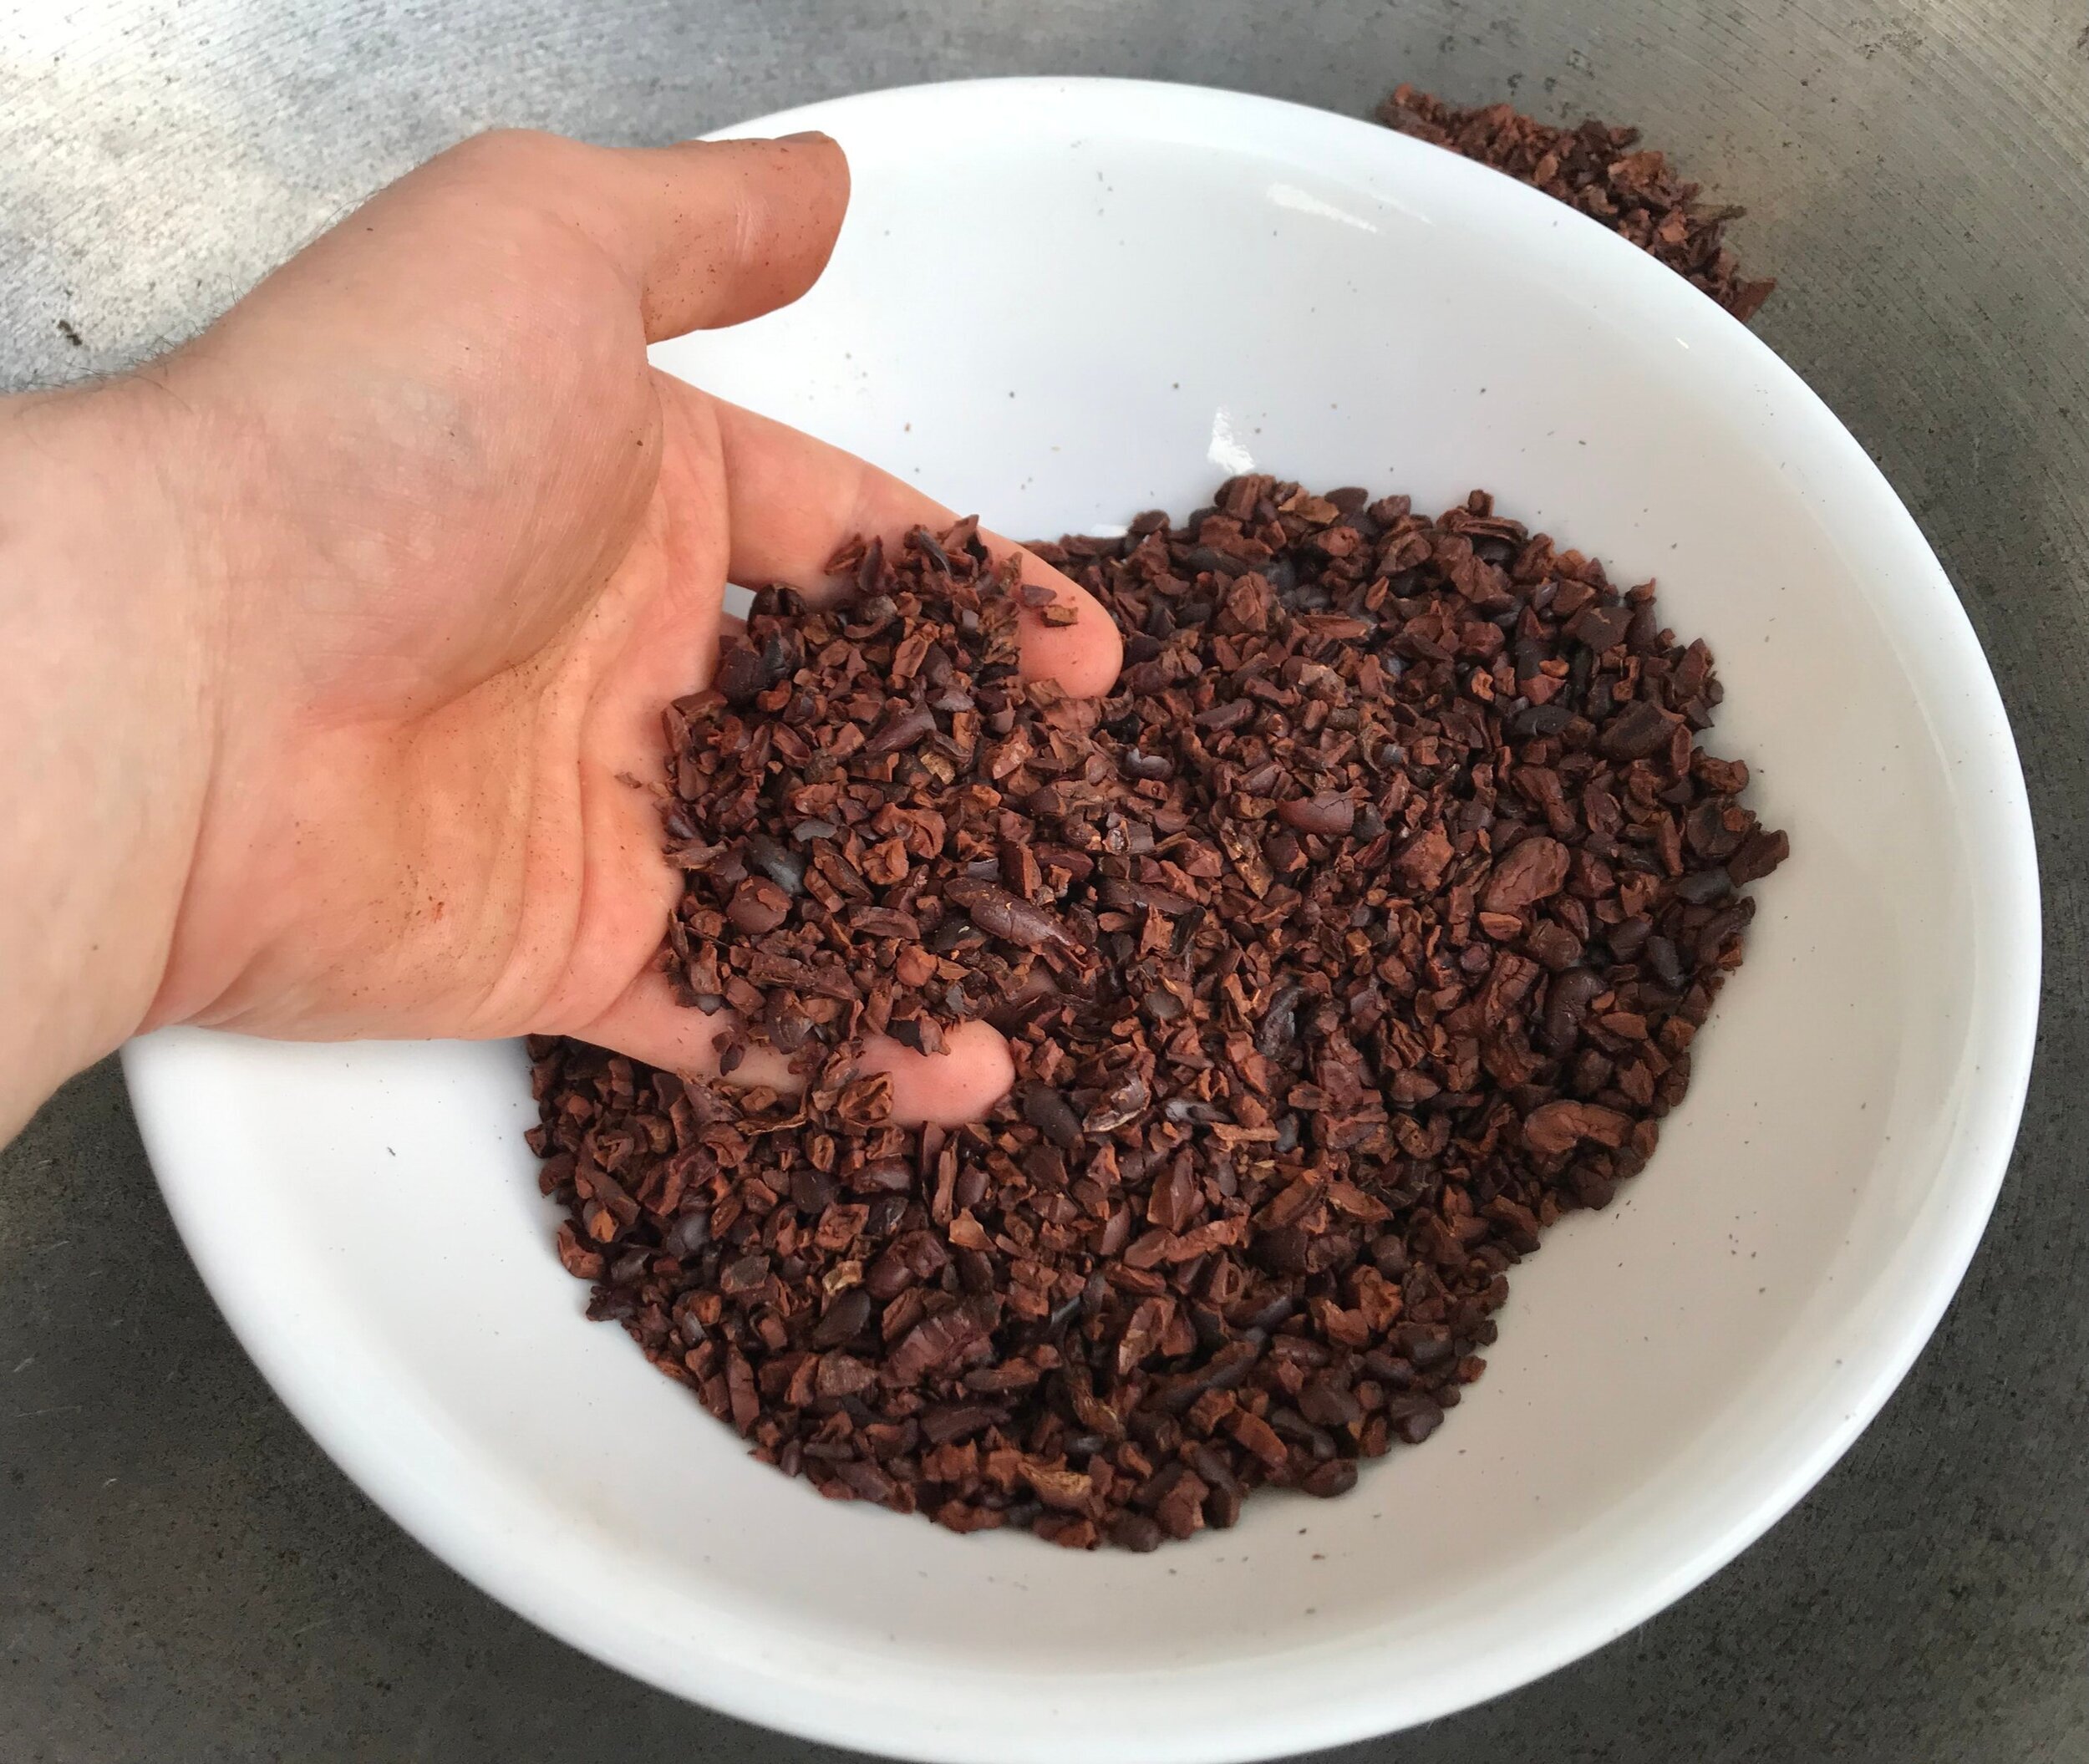
Cacao nibs and husks (shells).
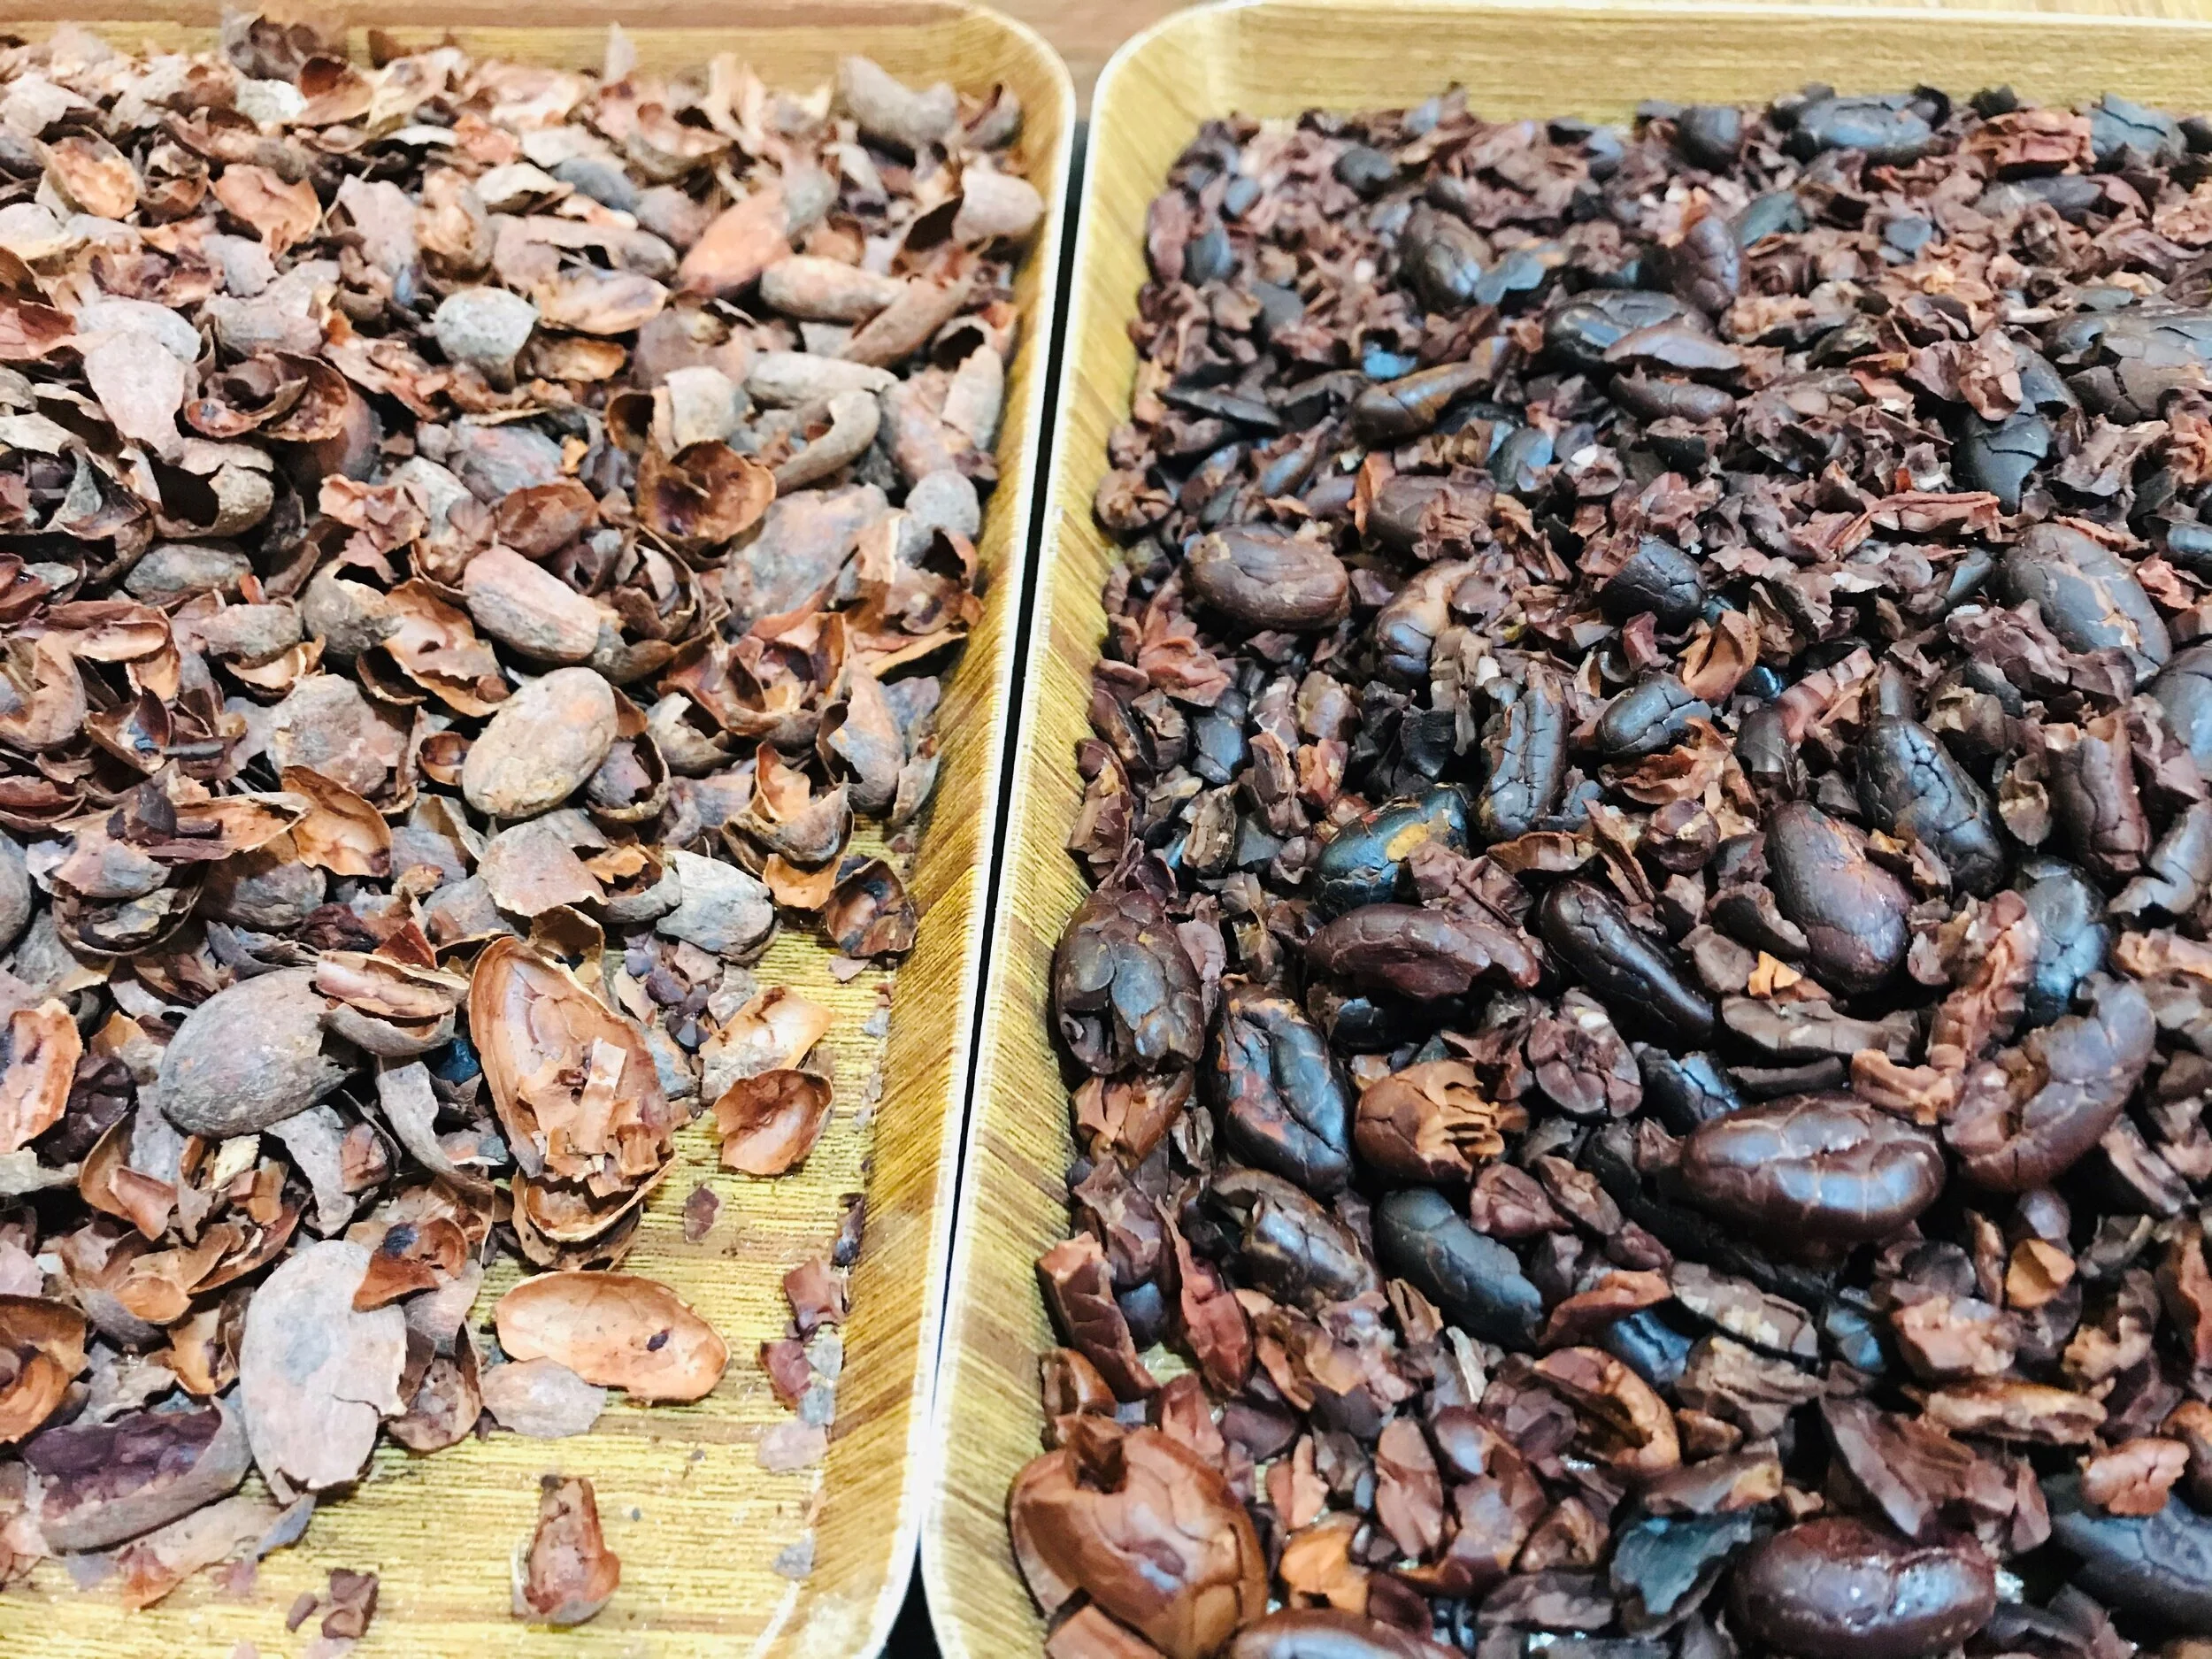
Cacao husks (left); Cacao Beans and nibs (right)
Cacao
The most important ingredient! Check out the bean to bar map under the “cacao growers and distributors” category to locate a business where you can purchase high quality, fairly traded cacao closest to where you live. The “cacao growers and distributors” are represented by the green pins on the map.
You can purchase cacao beans from other online sources, but remember even though terms like “heirloom” “organic” and “fair trade” sound great, they don’t actually have anything to do with flavour or quality of the cacao. There is a great deal of bulk cacao labeled with these terms, sold at higher prices, but lack the flavour and quality fine cacao should have.
Click here if you would like to learn more about cacao genetics and botany.
You can buy cacao nibs already shelled and roasted. Nibs are just the cacao bean with the shell removed. However, roasting your own cacao beans is part of the skill and the fun of making chocolate from scratch. However, if you’re adding many other ingredients where the flavour of the cacao will be masked, buying cacao nibs from a reputable source may be all you need.
Finding the right cacao is the most important, and sometimes most challenging part. If you have more questions, feel free to contact me!
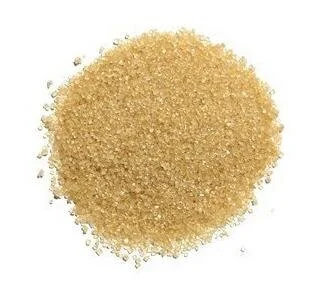
Sugar
Chocolate often needs at least a little sugar to bring out the nice aromatic flavours of the fine cacao. Too much sugar will mask these pleasant aromas, while too little sugar makes it difficult to detect the aromas due to the intensity of the cacao alone.
Sugar MUST be dry. NO honey, brown sugar (which is coated in wet molasses), syrups of any kind, or any liquid sweeteners can be added. They will gum up and thicken the chocolate, put strain on the refining equipment, and make it impossible to properly temper your chocolate. Chocolate is fat based, and hates moisture/water.
Sugar options include:
White refined sugar
Unrefined cane sugar
Coconut sugar
Crystallized/dehydrated honey or maple sugar
Non “sugar” related ingredients that are sweet such as lucuma powder
Anything that is a dry, powered, and in a crystallized state that may add some sweetness
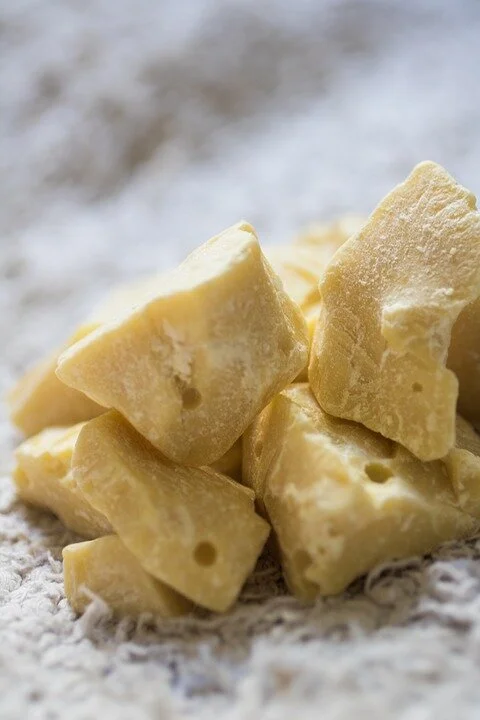
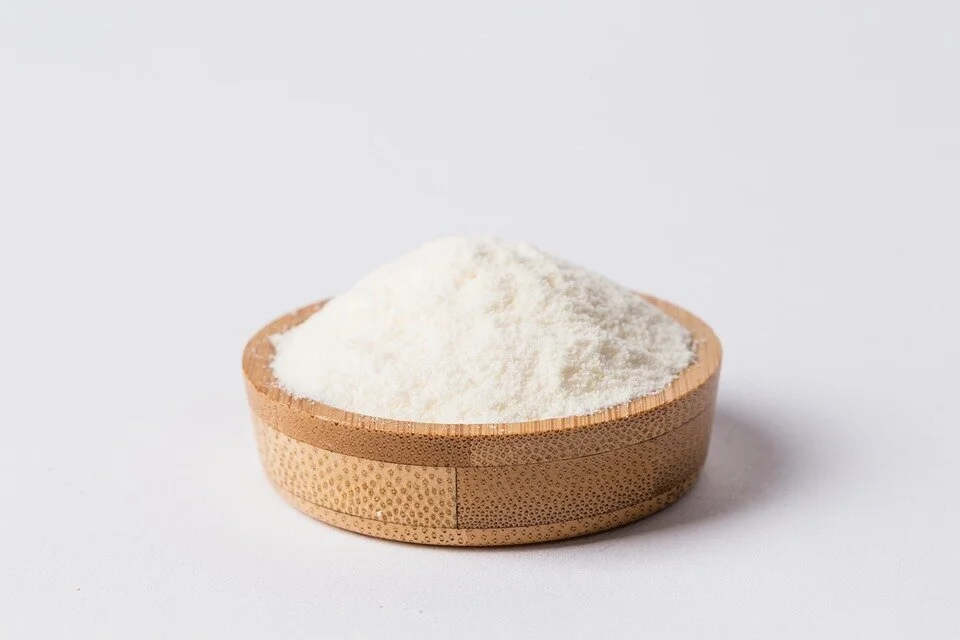
Cocoa Butter
Cocoa butter is produced by pressing cacao beans and extracting the fat. It’s light yellow in colour and can come in deodroized and non-deodorized. Make sure it’s food grade.
Non deoderized cacao butter contains some of the aromas from the beans from which they were pressed from. Therefore, different sources of deodorized cacao butter will have a slightly different flavour. Deodorized cacao butter has the aromas removed, and doesn't have much flavour at all.
Some of the cacao growers/distributors often sell cocoa butter as well.
Making your own is very time consuming!
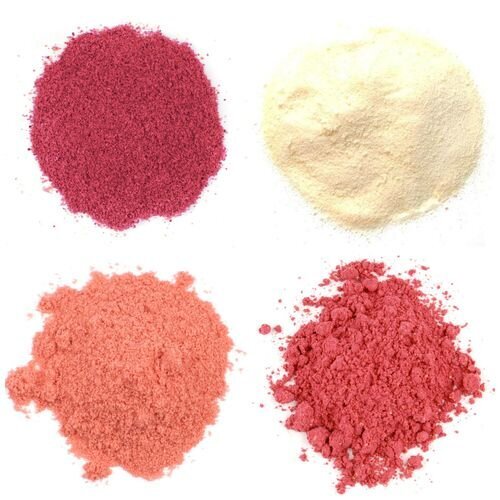
Freeze dried fruit powders
Milk Powder
Other Ingredients
Just like with the sugar, any ingredients you add to the wet-grinder with the cacao must be dry or fat based. They must not contain moisture or water!
Adding other ingredients turns your dark chocolate into “flavoured chocolate” for which there are endless varieties.
It’s best to pre-grind these ingredients to reduce stress on the wet grinder (grinding your coffee beans into grinds, or grinding your nuts into a powder).
Some ingredients include:
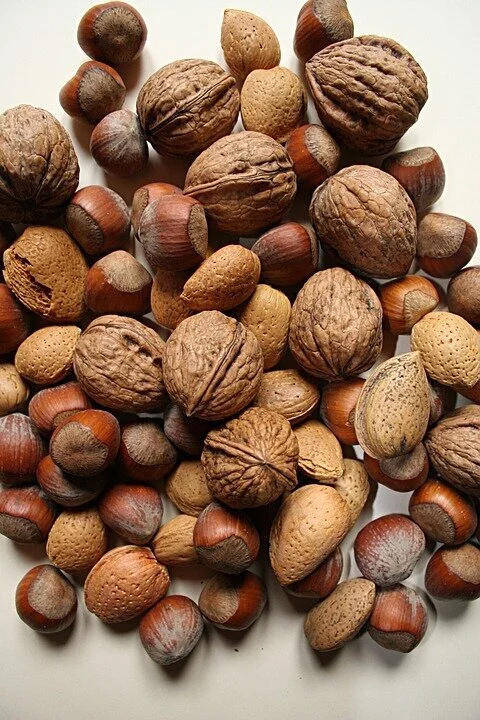
Nuts (hazelnuts, almonds, cashews)
Cacao beans & hazelnuts = gianduja
You can even mix cacao beans and nuts without sugar. The nuts will “sweeten” the mixture, add a nice nutty flavour, yet contain no sugar, perfect for diabetics, those on keto diets, or those who enjoy less sweet chocolate.
Seeds (sesame, coffee beans)
Freeze dried fruit or fruit/vegetable powders
Tea leaves (plain or infused, black or green, etc.)
Vanilla powder/Dried pods (not extract)
Dried coconut
Rolled oats
Milk powder (cow, goat, sheep, camel)
Spices in powdered form,
Dried herbs
Fat-based extracts, food grade infused oils
The list is endless. Just remember, no water/moisture!
Start Chocolate Making!
The following will be a step by step process of what you will need to do to make your own dark chocolate from scratch.
Sorting
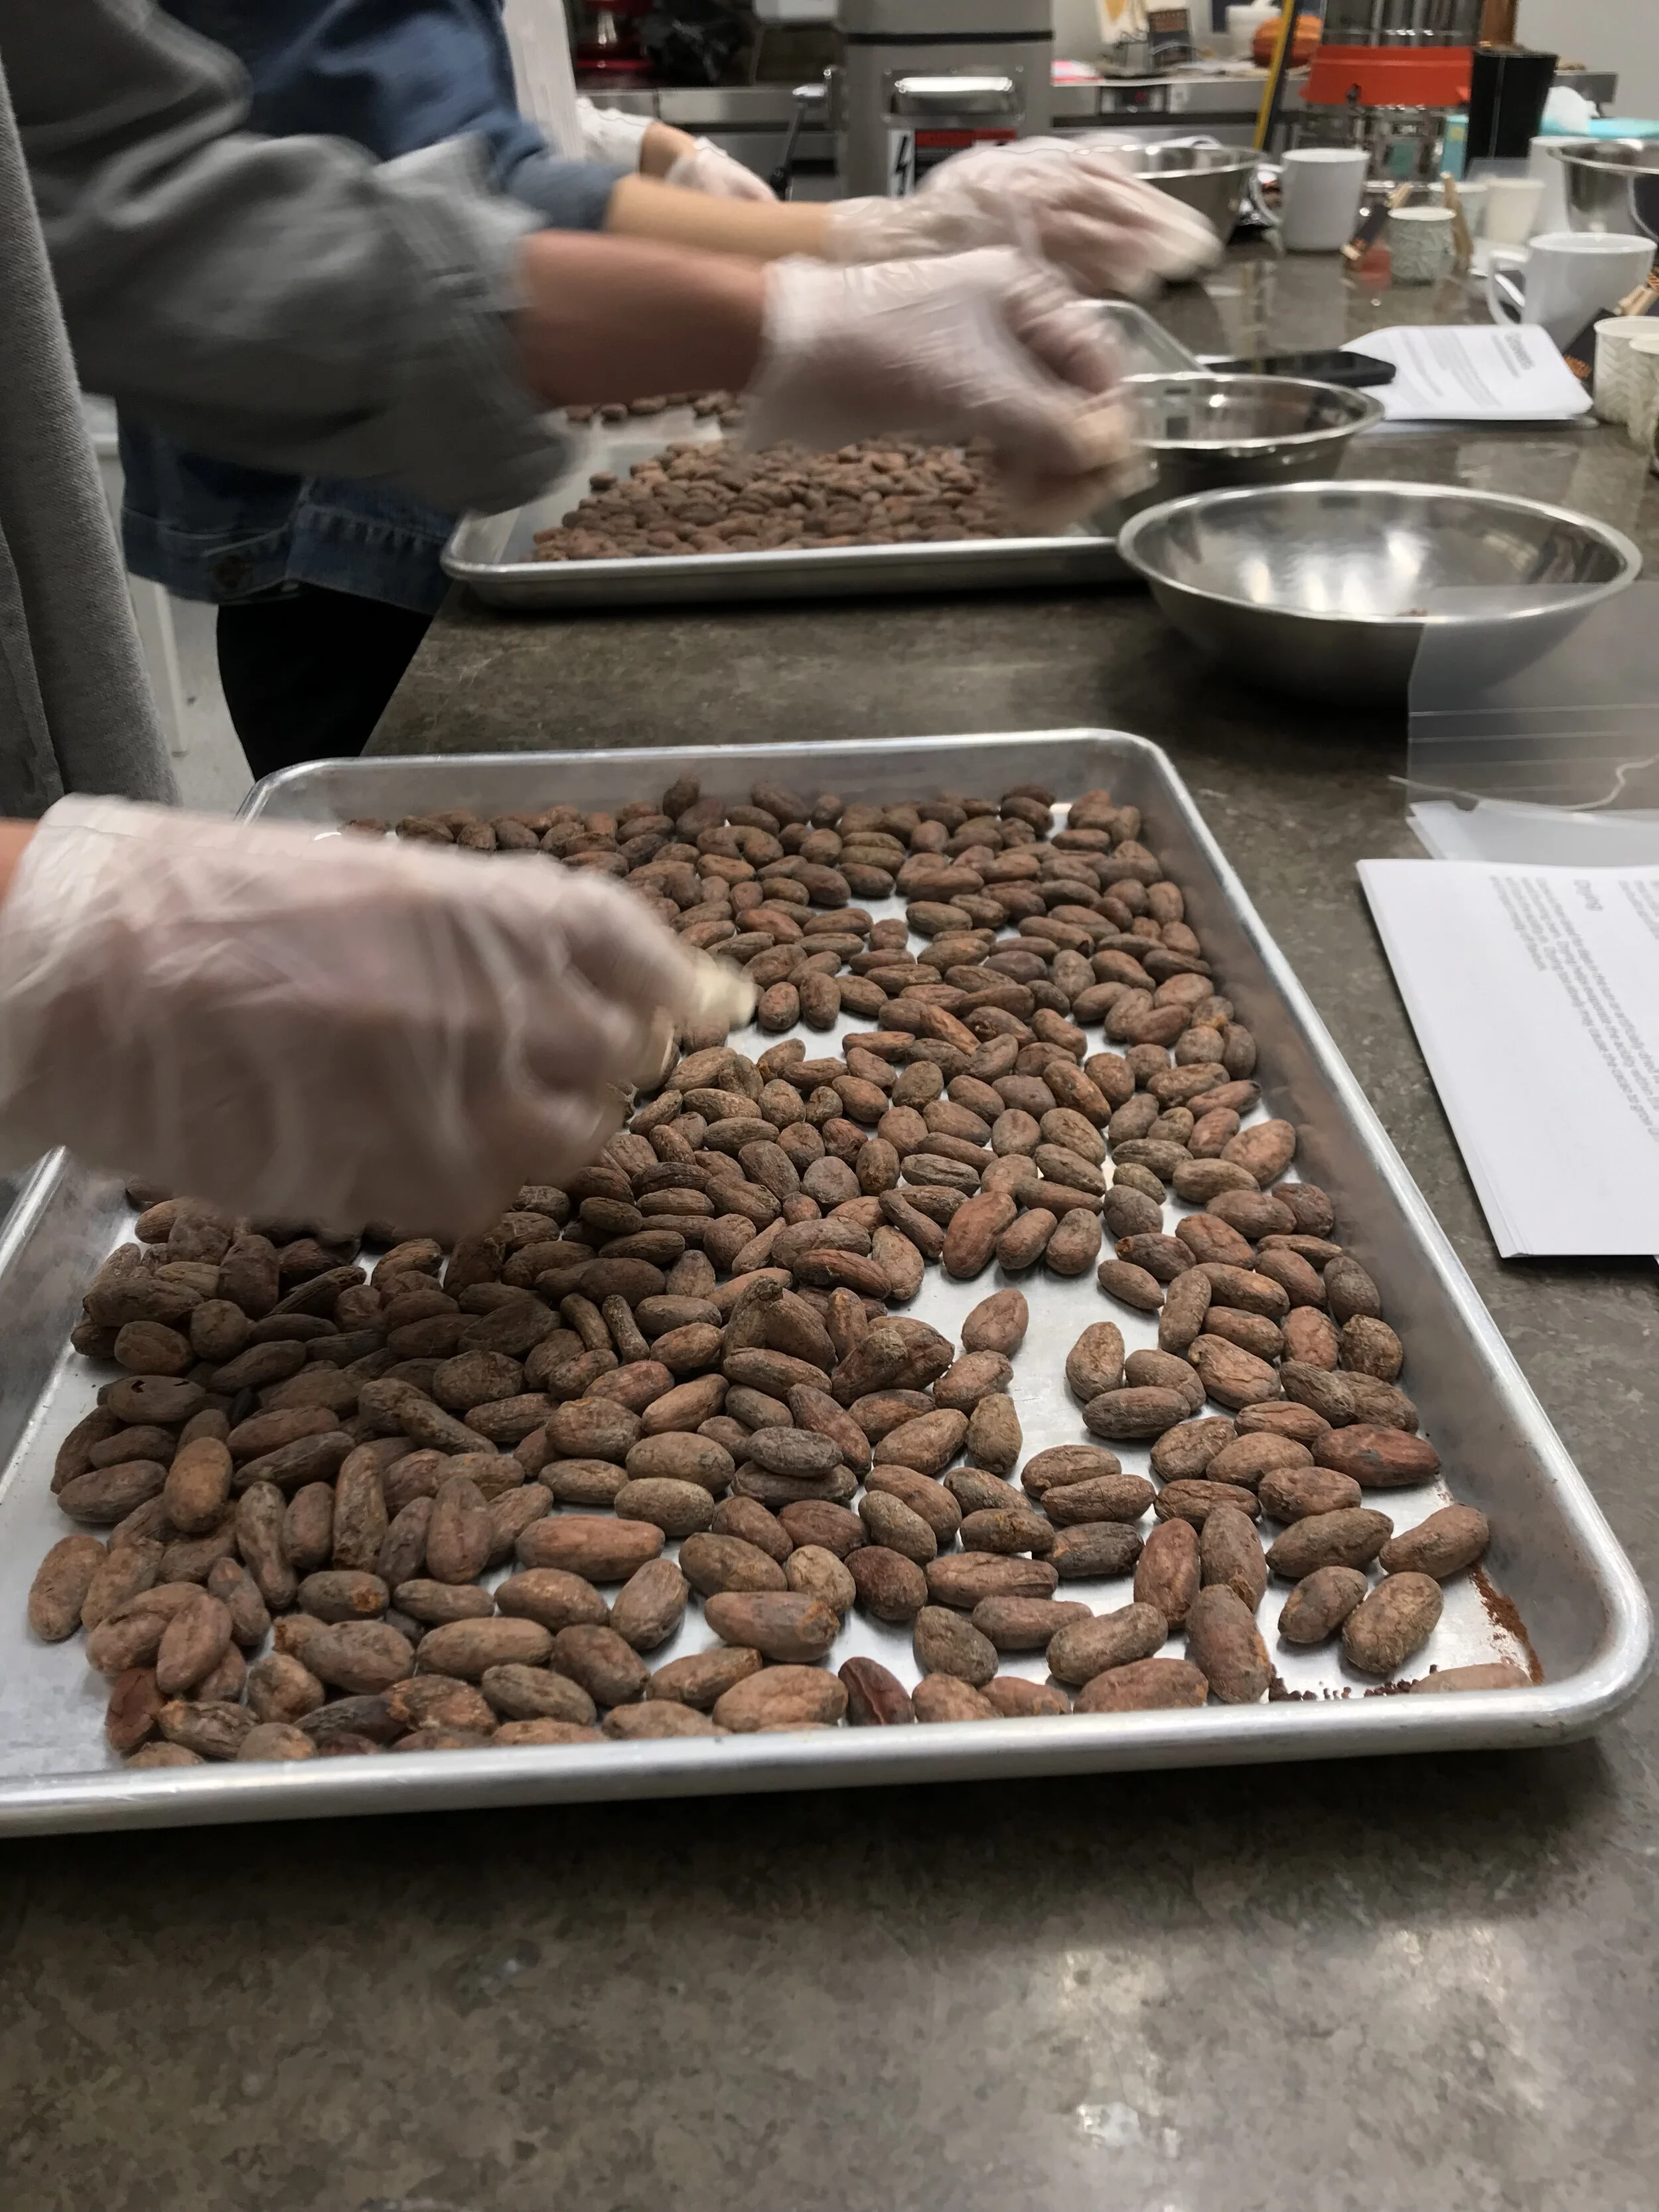
This is the first step in chocolate making, cacao quality control. When you receive your cacao beans, they are post fermented and dried (sun dried usually, but sometimes artificially dried ). They come with a moisture content of around 7-8%. If they are less than 7% dry, they will break apart during shipping. If they are too moist, they will mold.
It’s up to you to go through every cacao bean! Yes, you heard me correctly. Below we will go over some reasons why you need to carefully sort your cacao.
+ Info On Raw Cacao
Please Note Raw cacao beans have been known to sometimes be contaminated with salmonella, so when handling raw cacao, please use the same precautions as you would raw chicken. Don’t cross contaminate, and make sure to wash your hands and the equipment after sorting.
This is because raw cacao beans are fermented (by fungi, yeasts, and bacteria), and are laid out in the open air to dry where insects and animals can come into contact with them. This is one reason why we will roast the cacao beans.
There are makers who use raw cacao (or lightly roasted) to make chocolate, but this page will not go into more detail regarding that.
Sort through the cacao beans by placing a batch on a tray, and from left to right, go through them while removing the following:
Sorting out waste:
Broken/cut/exposed seeds
Sometimes seeds are sliced open, have half the husk removed exposing the kernel or “nib” or look damaged in some way.
Flat seeds
Sometimes you will see seeds that look like they’ve been deflated. Sometimes one end of the seed is a bit flat, but the other side is round and plump. Some seeds are thin, but not exactly flat, as there seems to be some amount of cacao kernel inside them. It’s up to you how pick you want to be. Sometimes I use some cacao beans that are a little flat, or flat on one end. It really depends on how much “meat” is inside them. If they are completely flat, they are not really worth keeping
Fused
Sometimes seeds are fused together or fused to other bits of dried botanical matter. They likely will not roast properly and if they are attached to other non-cacao matter, it may contaminate the rest of your batch when you crack and winnow.
Moldy looking
These are sometimes hard to detect if you don’t have much experience with what to look for. They sometimes are cracked a bit, or appear like more matter is stuck to the husk, sometimes white or a colour unlike most of the other cacao beans. If you see cacao beans like this, and you open them up, you may see an off-colour nib, usually with some white matter within it.
Other debris
You may come across other non-cacao debris such as dried pieces of leaves, stems, cocoa pod, rocks, yarn, feathers, etc. If these end up in your melanger they may damage the equipment, and some may impart off-flavours or be a health hazard
Sorting for size:
Depending on the amount of cacao you're working with, and how precise you want to be, you can also sort your cacao according to small beans and larger beans as well. You'll find some sources of cacao offer consistency in size, while other sources will often contain an array of sizes, sometimes some being double in size of other cacao beans.
When it comes to roasting, the smaller cacao beans will burn by the time the larger beans come to temperature, or the larger beans will not by fully roasted when the smaller ones reach temperature.
This is not a necessary step, but obtaining an even roast is optimal, but is also time consuming to also sort. It doesn't have to be exact, but a rough sort, or one tray at the end that only contains the small cacao beans.
So what should cacao beans look like then?
Round and plump! You will definitely get variety between cacao sources and within the same batch.
Discard the unusable cacao beans and debris from the sorting process.
You can compost these. Keep track of the percentage of wastage for your own records. You’ll notice different suppliers will have different percentages of usable/unusable cacao.
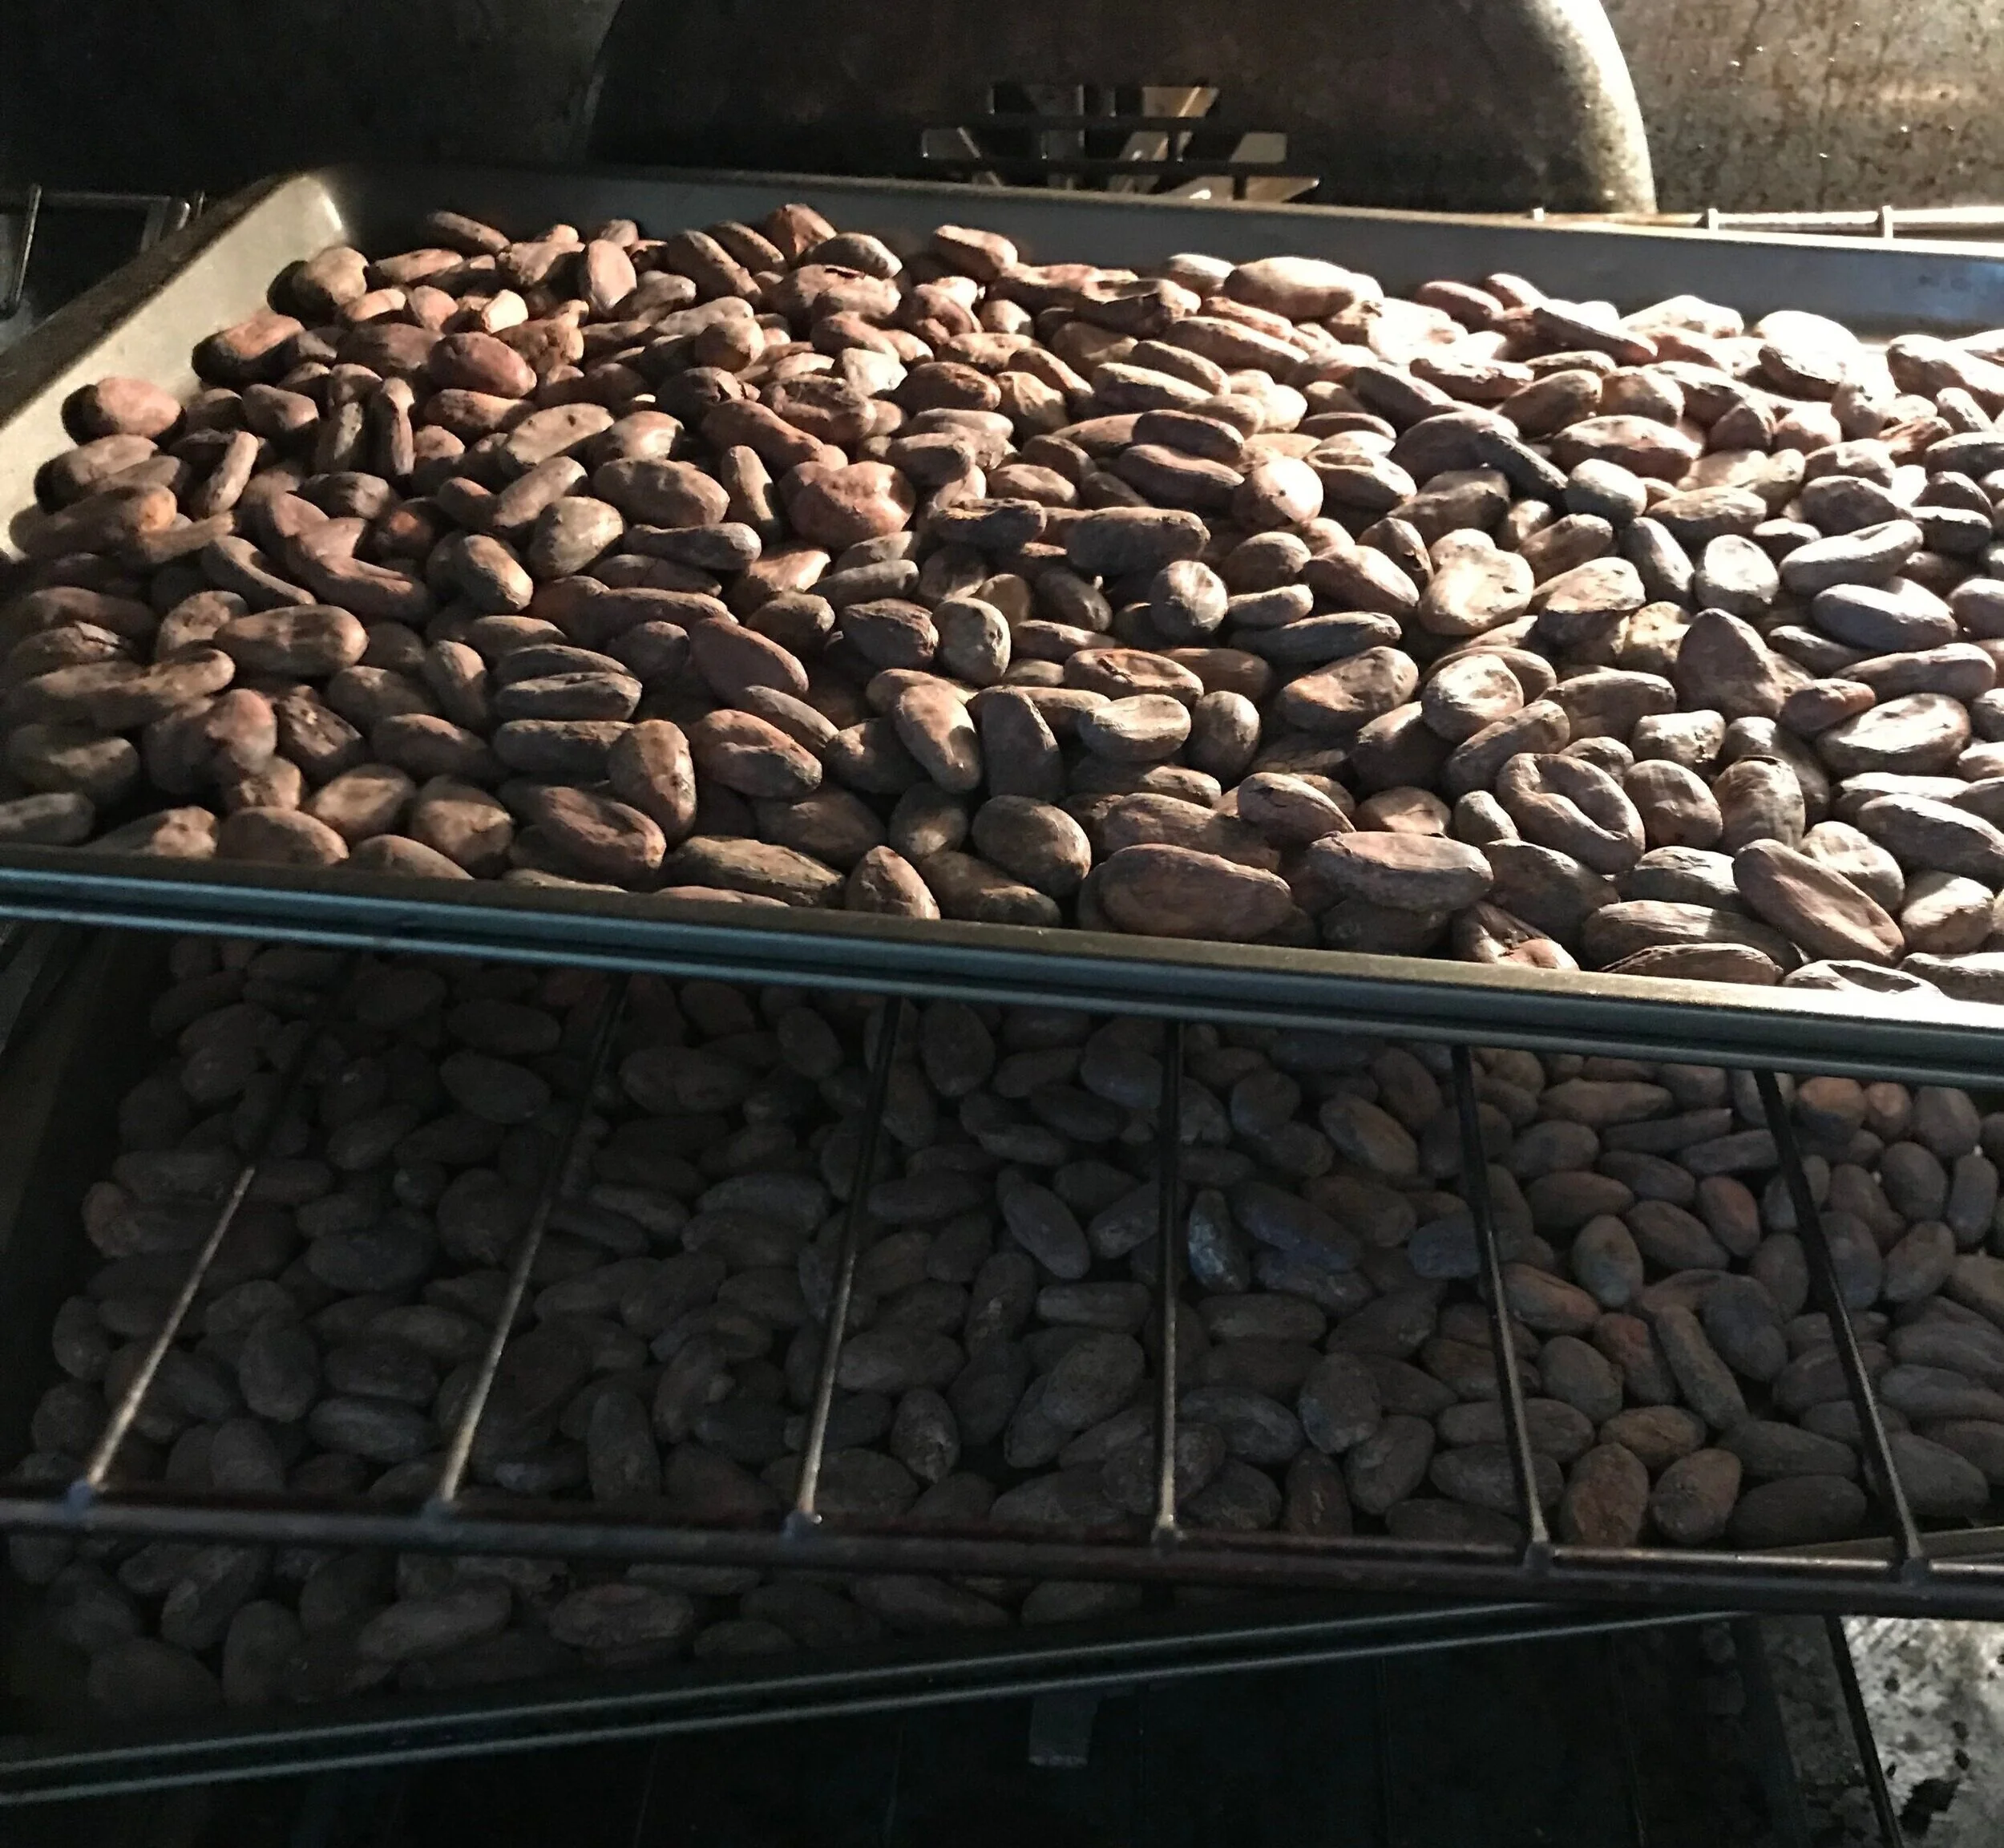
Roasting
There are many factors that impact the flavour of cacao, including genetics, harvesting, fermentation, and drying.
Roasting is also one of these factors, and is a step in transforming the flavour of cacao into the flavour that resembles chocolate. This is also the first step of flavour transformation in which you have full control over as a chocolate maker!
Roasting is a major component that sets bean to bar makers apart from chocolatiers. There are some makers who don’t roast their own cacao, which is fine, yet this step is a crucial skill every maker must work on. The skill involved in roasting well is part of what it means to be a bean to bar maker. Roasting is also the first step most makers have to experiment with flavour by altering the length of time time and temperature during roasting.
Roasting impacts your cacao in the following ways:
Forms flavour molecules such as pyrazines, alcohols, and esters which give your cacao and your chocolate its wonderful flavour. Without roasting or roasting properly, these flavours won’t develop. If roasted too high a temperature or too long, you risk burning off these flavours or adding a burnt flavour to your cacao.
Raw cacao or chocolate made from raw cacao will never develop the depth or array of flavour roasted cacao will, due to the fact that these flavour molecules are formed only if the cacao is heated above 200-250*F.
Dries out the cacao from the 7% to closer to 1%. Drying is important because chocolate hates any amount of water whatsoever. Grinding raw cacao, or cacao that is not fully roasted/dried will be very thick and become difficult to temper and mould later on.
Even just a few percentages of moisture will thicken the chocolate too much. This is why cacao must be very dry, as well as any other ingredients added during the grinding phase.
Kills some of the potential hazards raw cacao may carry.
Certain potential hazards can be eliminated when roasting cacao to a certain temperature.
Reduces acidity and/or astringency of the cacao.
When cacao is fermented, acidic acid bacteria impart the cacao with a high amount of acidity. Roasting burns off some of this acidity. Although some tartness may be favorable to your chocolate, quality chocolate shouldn’t be acidic or sour. Some of that can be argued to be due to subjective preference, but a key aspect of a skillful chocolate maker is the ability to reduce the acidity produced from fermentation. If your cacao is too acidic, sometimes roasting can help reduce some of the acidity.
Detaches the husk from the kernel.
The husk or “testa” is the thin shell like layer around the kernel of the cacao bean. The kernel is what we want to use to make chocolate, but the husk we want to discard. Roasting makes the husk dry, brittle and detach from kernel so that it can be more easily removed later during winnowing. The longer you wait to winnow (remove the husk) from the nibs/kernel, the more chances you have of the testa adhering back to the nib again, so it’s best to winnow within a few days after roasting.
Temperature & Time:
Temperature:
There is no perfect temperature, since different sources of cacao and even different batches of cacao from the same source may require different temperatures to achieve your goal flavour profile.
As a general rule, most will roast their cacao beans around the 250°F/120°C, and within a range of about 225°F/108°C to 275°F/135°C. Cacao prefers a lighter roast than coffee. A good quality fine cacao will have a much greater range of aromas than coffee, but these aromas require a lighter roast (Under 275°F/135°C) or many of these aromas will be burned off, especially the lighter esters (fruity notes). That said, if you don’t roast high enough, the wonderful aromas will not be formed. As well, there are makers who have roasted cacao at even higher temperatures closer to 300°F, so again, it’s up to you to decide what works for your cacao.
During fermentation, proteins and carbohydrates in the kernel break down into simpler molecules known as amino acids and reducing sugars respectively. During roasting, these amino acids and reducing sugars go through a series of reactions (Maillard/Strecker) to bind together in the presence of heat to form aroma molecules. If you don’t roast your cacao at all, or roast at a high enough temperature (above 200°F) they will not form. This is why chocolate made from raw/unroasted cacao tends to all taste very similar regardless of the origin/type. It’s the roasting that expands the array and range of aromas that exist. Roasting, and roasting well is important.
You may notice that some cacao beans require a higher temperature to bring out the flavour profile you prefer, while others may require a lighter roast. It’s really up to you to figure this out. You can roast small handfuls of cacao and taste them to see if you notice any flavour differences.
Some makers also alter the temperature during roasting. For instance, you may want to raise the temperature in two or three increments. For example, start at 225°F, then 250°F, then 265°F. Or, you may want to start very high for the first few minutes, say 300°F, then down to 250°F for the duration of the time. There are different reasons for this. Certain aromas will form at different temperatures, and playing around with the temperature may help to form a wider range of aromas. We don’t know enough yet to say X temperature will form Y aroma, since it’s a complicated slew of reactions with different beans containing different types and amounts of amino acids and reducing sugars.
Time:
Most makers will roast their cacao from 18-30 minutes depending on the temperature and roasting apparatus. Again, there is no set time, but you want it to be long enough for the cacao beans to reach the desired temperature (using a laser thermometer to check them). As mentioned above, you may also want to mix up different temperatures at different lengths of time.
You can choose a standard temperature, say 250°F, and experiment roasting at 3 or 4 different lengths of time, and tasting to check if there is a difference in flavour profile, and going with the one you prefer most.
Some makers will roast at a lower temperature for longer periods of time, and some may do higher stronger roasts, although I recommend a more steady mid roast and 20-30 minutes.
Roasting Procedure
You can roast cacao in the oven, in a coffee roaster, or even in a pan on a stove. Below are a few methods to consider. The coffee roaster will offer the most even and efficient way to roast, but the oven is the simplest and cheapest way since you likely already own an oven.
1. Oven roasting
Preheat your oven to the desired temperature.
Lay out your pre-sorted cacao evenly on a metal tray. No need for any parchment paper. Ensure the cacao is laid out in one even layer, and not piled on top of each other. Depending on your oven, you can roast two or three trays at a time.
If you have a convection oven (a fan), be sure to turn the fan on. I find it helps circulate the air for a more even roast. If you don’t have a convection oven, that’s no problem! Just pay more attention to rotating your cacao and trays.
Be sure to rotate the trays and mix the cacao half way through or a couple of times during roasting to ensure an even roast. Turn the trays 180 degrees, place the lower trays to the top of the oven and vice versa, and mix the cacao in the tray by moving cacao from the edge of the tray towards the center and vice versa. Try to rotate them quickly, since the longer the oven is open the more the temperature will drop and impact the roast.
Use your laser thermometer to check the temperature of the cacao when you rotate. Don’t open the oven too often or this will alter the temperature. Remember that although your temperature is set to say, 250°F, it may take 20-30 minutes to reach that temperature. Also, the tray at the top of the oven may be warmer than the cacao at the bottom.
Once your cacao begins to fill the kitchen with the aroma of chocolate cake or brownies, they are about ready to come out. Again, check the temperature of the cacao with your thermometer to ensure they have reached the desired temperature.
Don’t be afraid to taste a few beans as they get closer to the temperature to see how they are coming along and if you can notice any difference between say when they are 225°F and 250°F.
Once they are ready, remove them from the oven, and place the trays somewhere to cool. If you are roasting more cacao than you have trays, than empty the cacao into a big metal bowl to cool, and reuse the trays to keep roasting all your cacao.
While the cacao is still warm, the fat in the kernel is liquefied, so the beans will feel chewy as opposed to crispy. This is okay. Once they cool completely they will become crispy!
SPECIAL NOTE: Depending on where you live, there may be guidelines for what temperature cacao must be roasted in order to ensure it is safe to consume. Since bean to bar chocolate making is quite new, most health and safety departments don't really know themselves what temperature cacao should reach, but 250* tends to be a standard goal. Again, if you are selling the cacao or the chocolate you are making, you may want to check if the local authorities have any roasting standards.
Raw cacao beans (dried, unroasted cacao) have been known to carry salmonella, due to the fact of how they are fermented and dried, exposed to birds and insects and other potentially harmful elements. This is one reason cacao is roasted above 250°F, and why the husks are removed and discarded.
You can practice roasting tiny batches of cacao at various temperatures and lengths and see if there is one which produces cacao that for you is most tasty.
Once all your cacao is roasting, allow them to cool. The next step will be to crack and winnow them. However, you don’t have to do this the same day. Cacao beans can easily absorb surrounding odours and moisture (the absorbed moisture will make the husks adhere back to the nib), so ensure they are in an airtight reusable bag or container until you are ready to winnow them. Just ensure they are cool before you seal them up. Again, try and crack/winnow them within a few days of roasting to ensure most of the husk is released from the nibs
2. Using a drum coffee roaster
Follow the manufacturers instructions. Generally you set the time and temperature, pre-heat, and then add your cacao beans. The machine does the job of evenly rotating the cacao beans throughout the process, so you don’t need to intervene.
For an affordable sized roaster, you’ll likely have to do many rounds of roasting, but at least you can leave it and do something else while it roasts. Just be sure to set the timer!
Use some of the same techniques above in regards to experimenting with time and temperature to play around with the roasts.
For more information on roasting and its impact on flavour, check out my research blog and search “roasting” to see some science behind roasting cacao.
Cracking & Winnowing

For some this can be the most fun or the most tedious part of chocolate making, depending on your temperament and the equipment you’re using.
Cracking and winnowing involves breaking up the cacao beans into nibs and the husk, and then using air in some form to remove the lighter husks from the heavier nibs.
Reasons for removing the husk from the kernel:
Flavour reasons. The testa or “husks” will impart a very dry, bitterness to the chocolate if left on the cacao beans. All chocolate has a small amount of cacao husk, but the less it contains the better.
Health reasons. The husk also likely has more contaminants, even after roasting. It is the part of the bean exposed to the surrounding environment. It had yeasts, fungi, and bacteria surrounding it during fermentation. It was exposed to the elements during drying back where it was harvested.
When cacao is dried, it’s often sun dried in the open where animals and insects can get to the beans, defecate on them, or where the wind may blow pesticides being sprayed on the trees on the farm. Although roasting may kill some contaminants, it doesn’t rid all of them, so removing most of the husk as possible is not only tastier but safer for consumption as well.
Some cacao can have higher amounts of minerals such as cadmium, which is not something you want high amounts of. These can come from the soil, but also from pesticides such as high levels of copper. The husks tend to hold many of these unwanted elements as well.
Texture reasons. Husks will also impact the texture if too much is contained in the chocolate, making it a little more gritty or less creamy.
Cracking & Winnowing Procedure:
Hairdryer method:
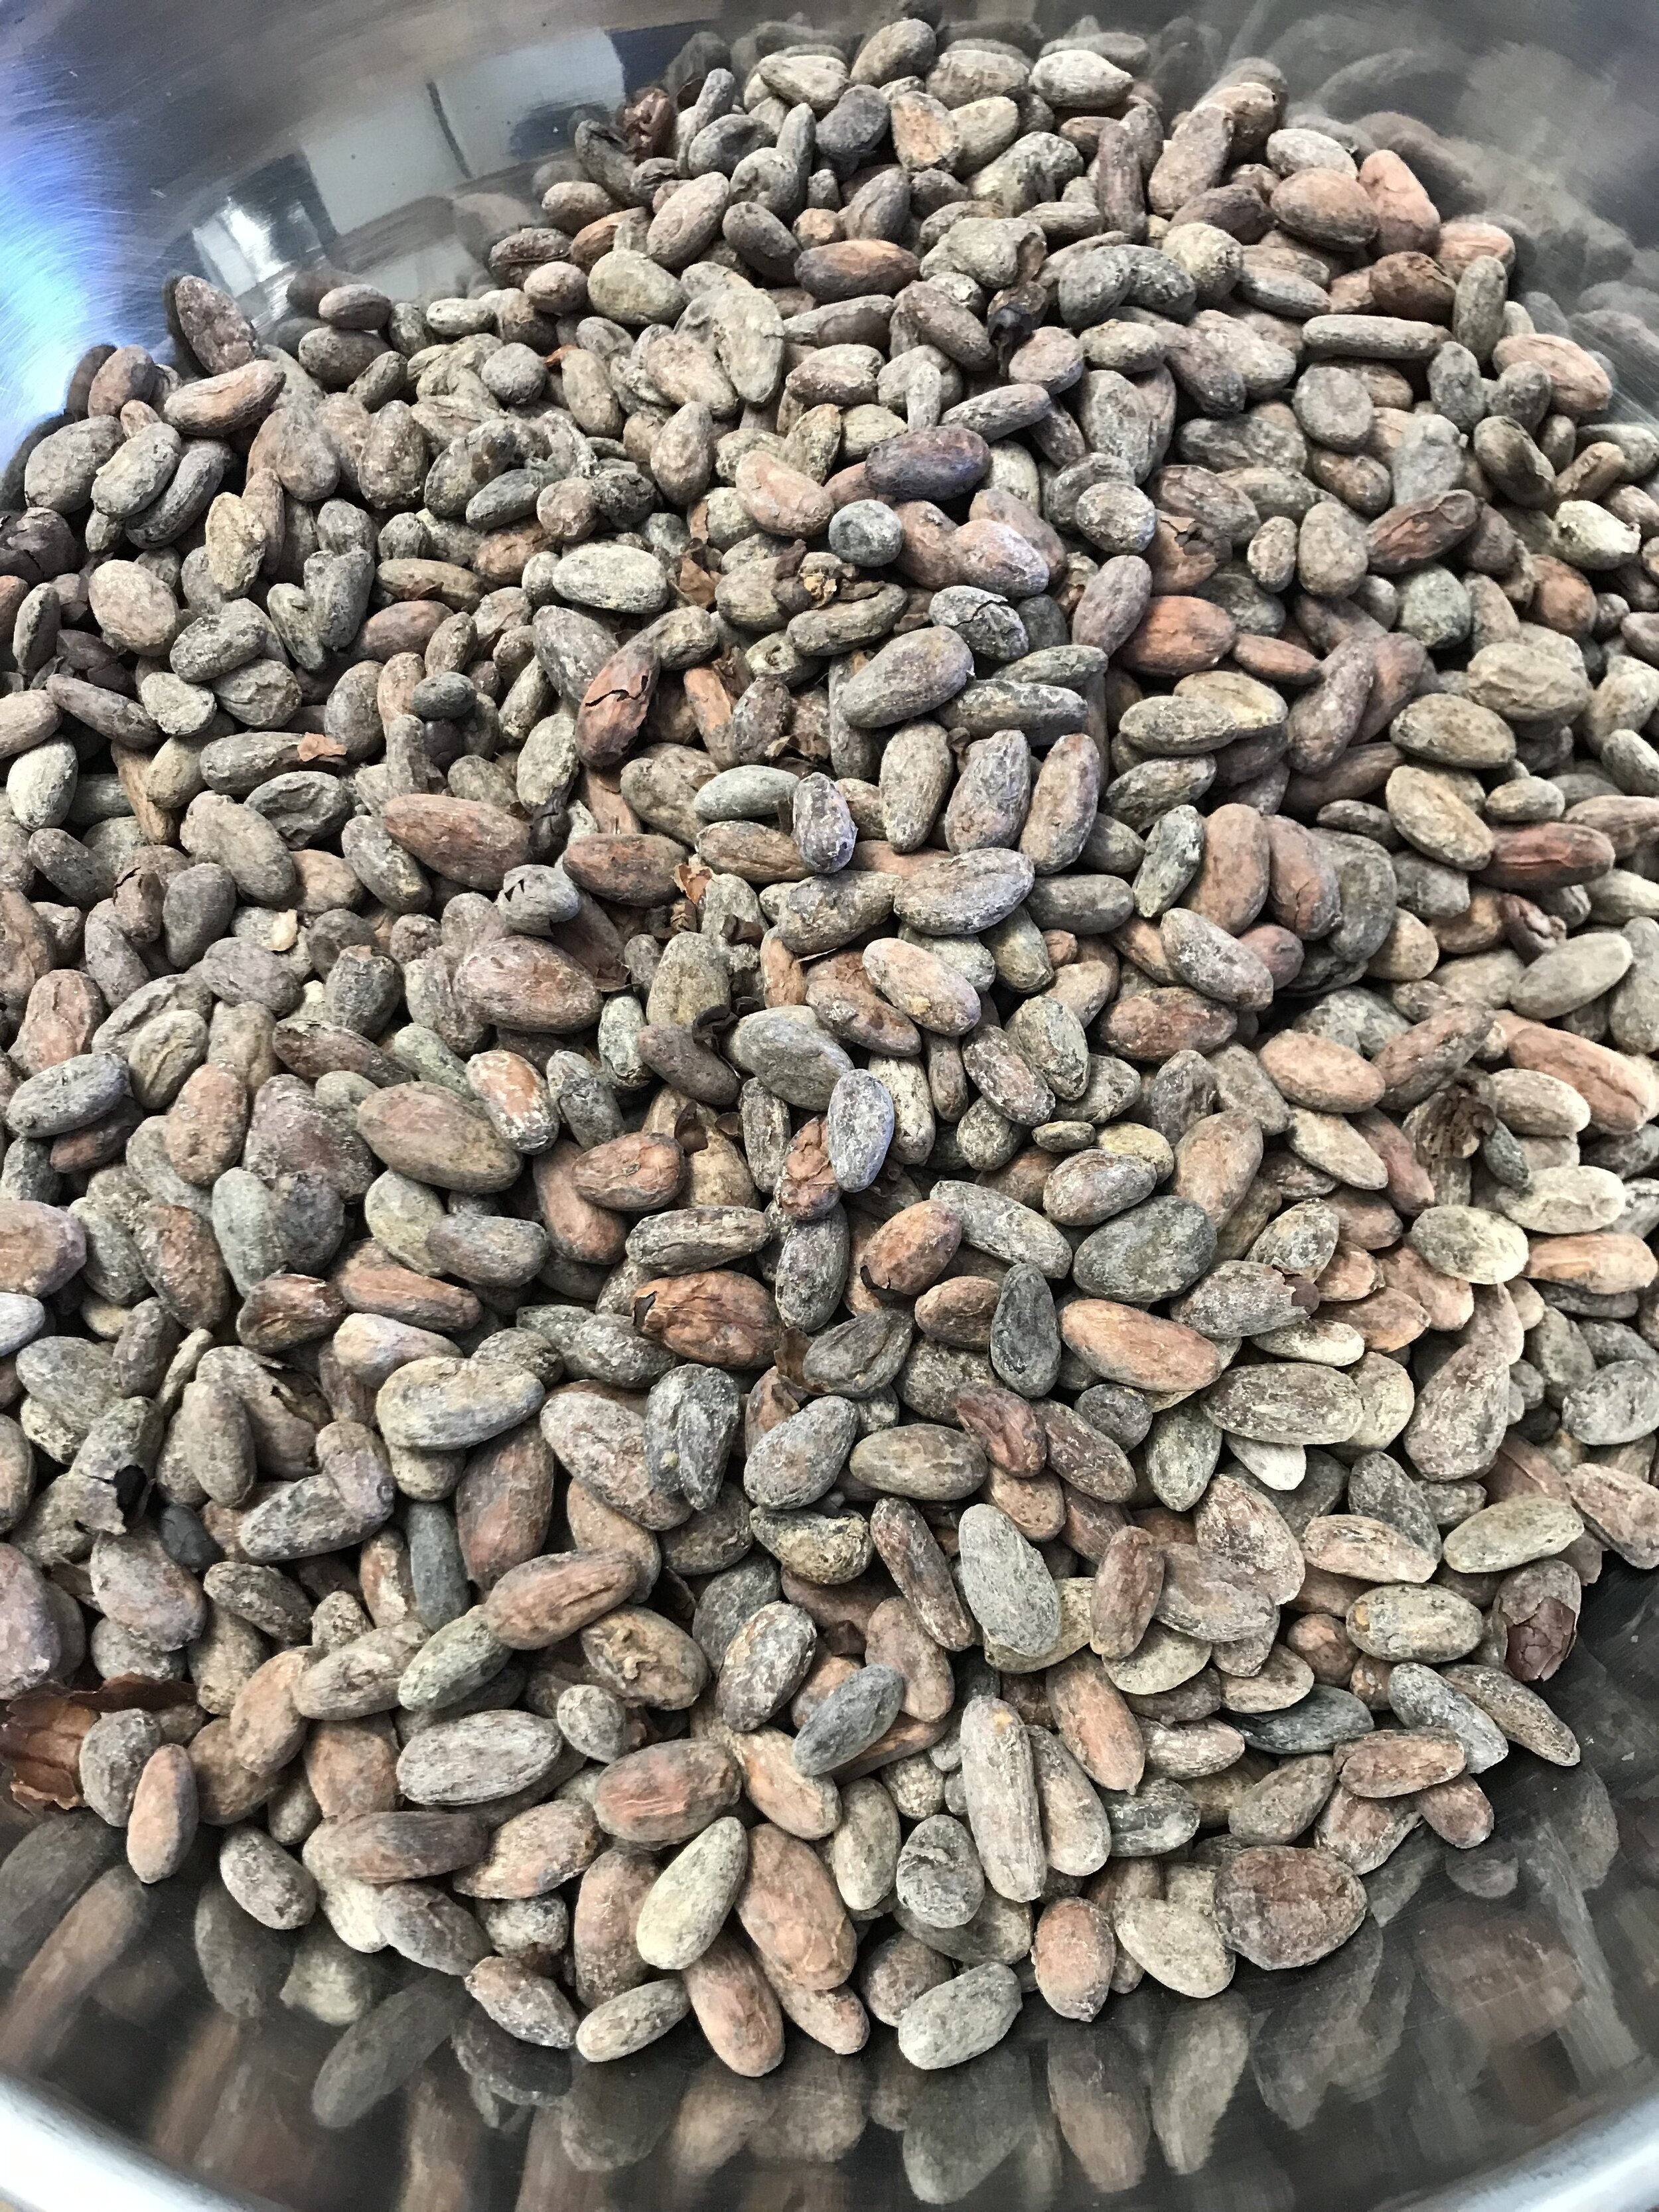
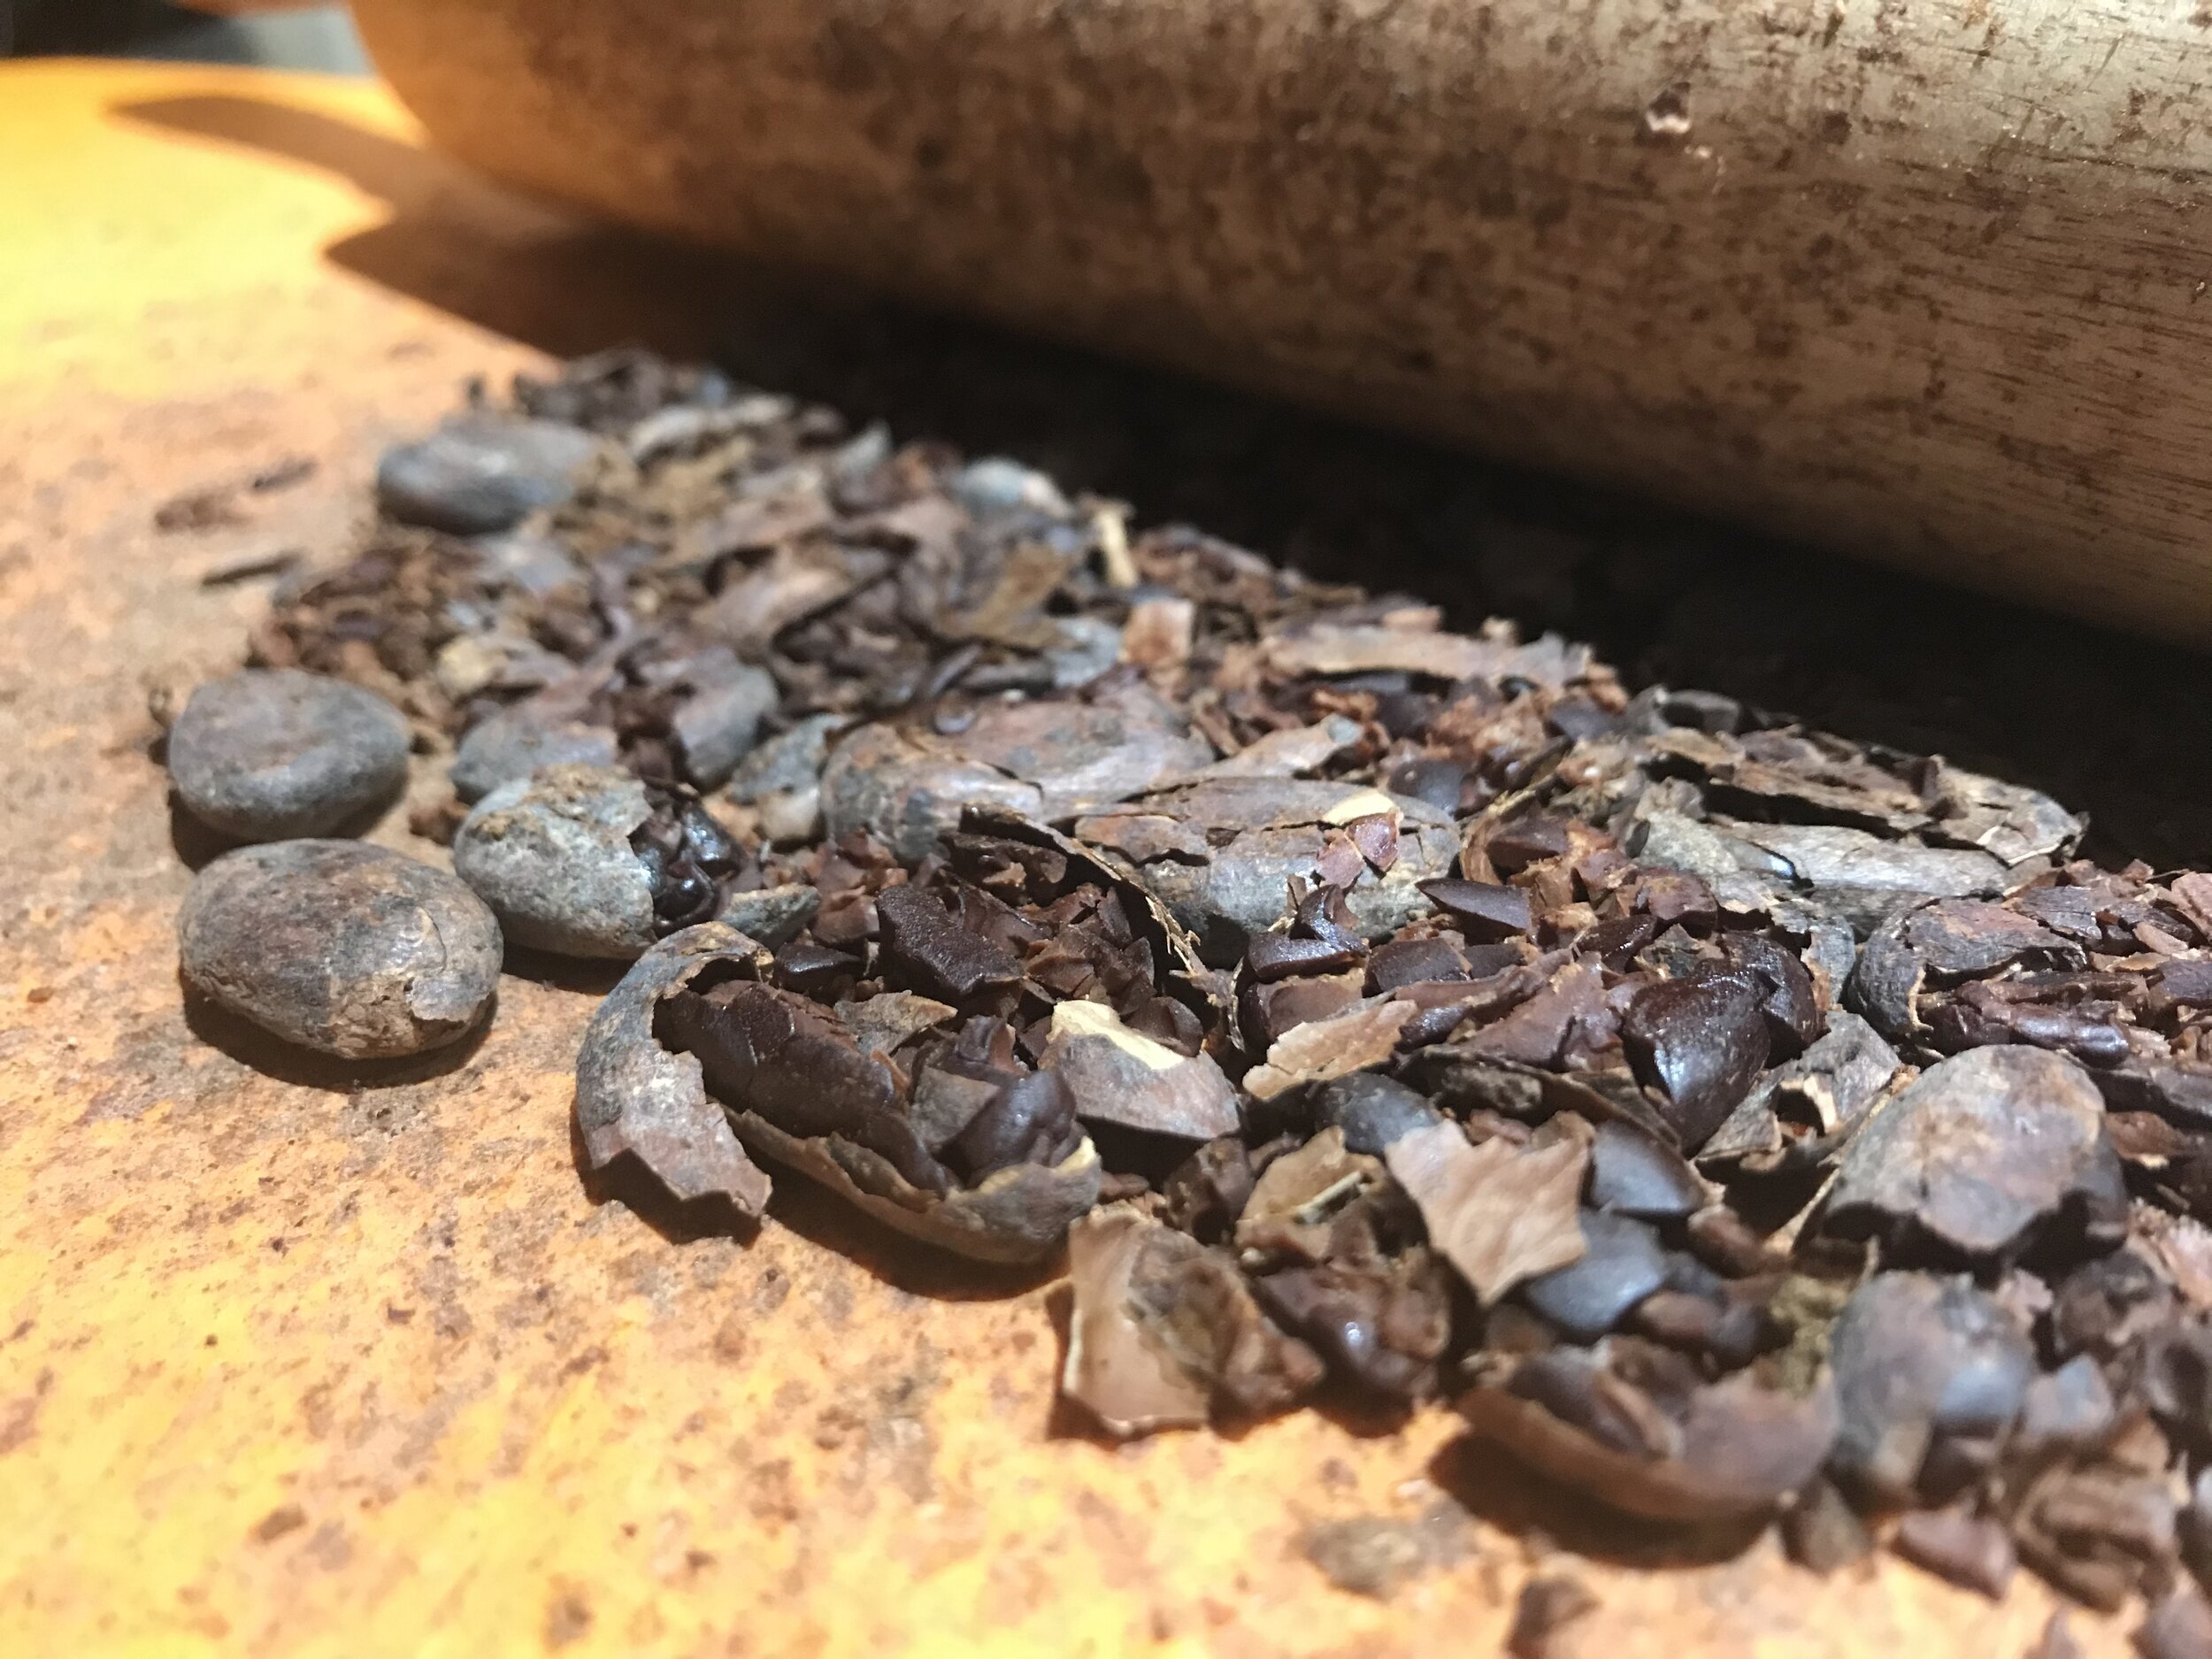
Crack! Lay out your roasted and cooled cacao beans on a table, on a chopping board, or in a large plastic bag (so that they don’t go all over the place if you have a small pace). Use a rolling pin to roll over the cacao beans to crack them open.
If you are doing small amounts, you could even hand crack/peel the shells off. Perhaps flip a movie on or get some friends to help you with this.
They key is to not crack the nibs too small and create too much “nib dust”. When we winnow, the smaller bits of nibs will be blown away with the husk. In order to reduce the amount of nib waste, don’t over roll them.
Roll over a few times, then throw the mixture of nibs and husks into a large container. Before you remove the cracked nibs and husks, remove the cracked nibs and crack them in the next round.
Keep doing this until all your cacao beans are cracked.
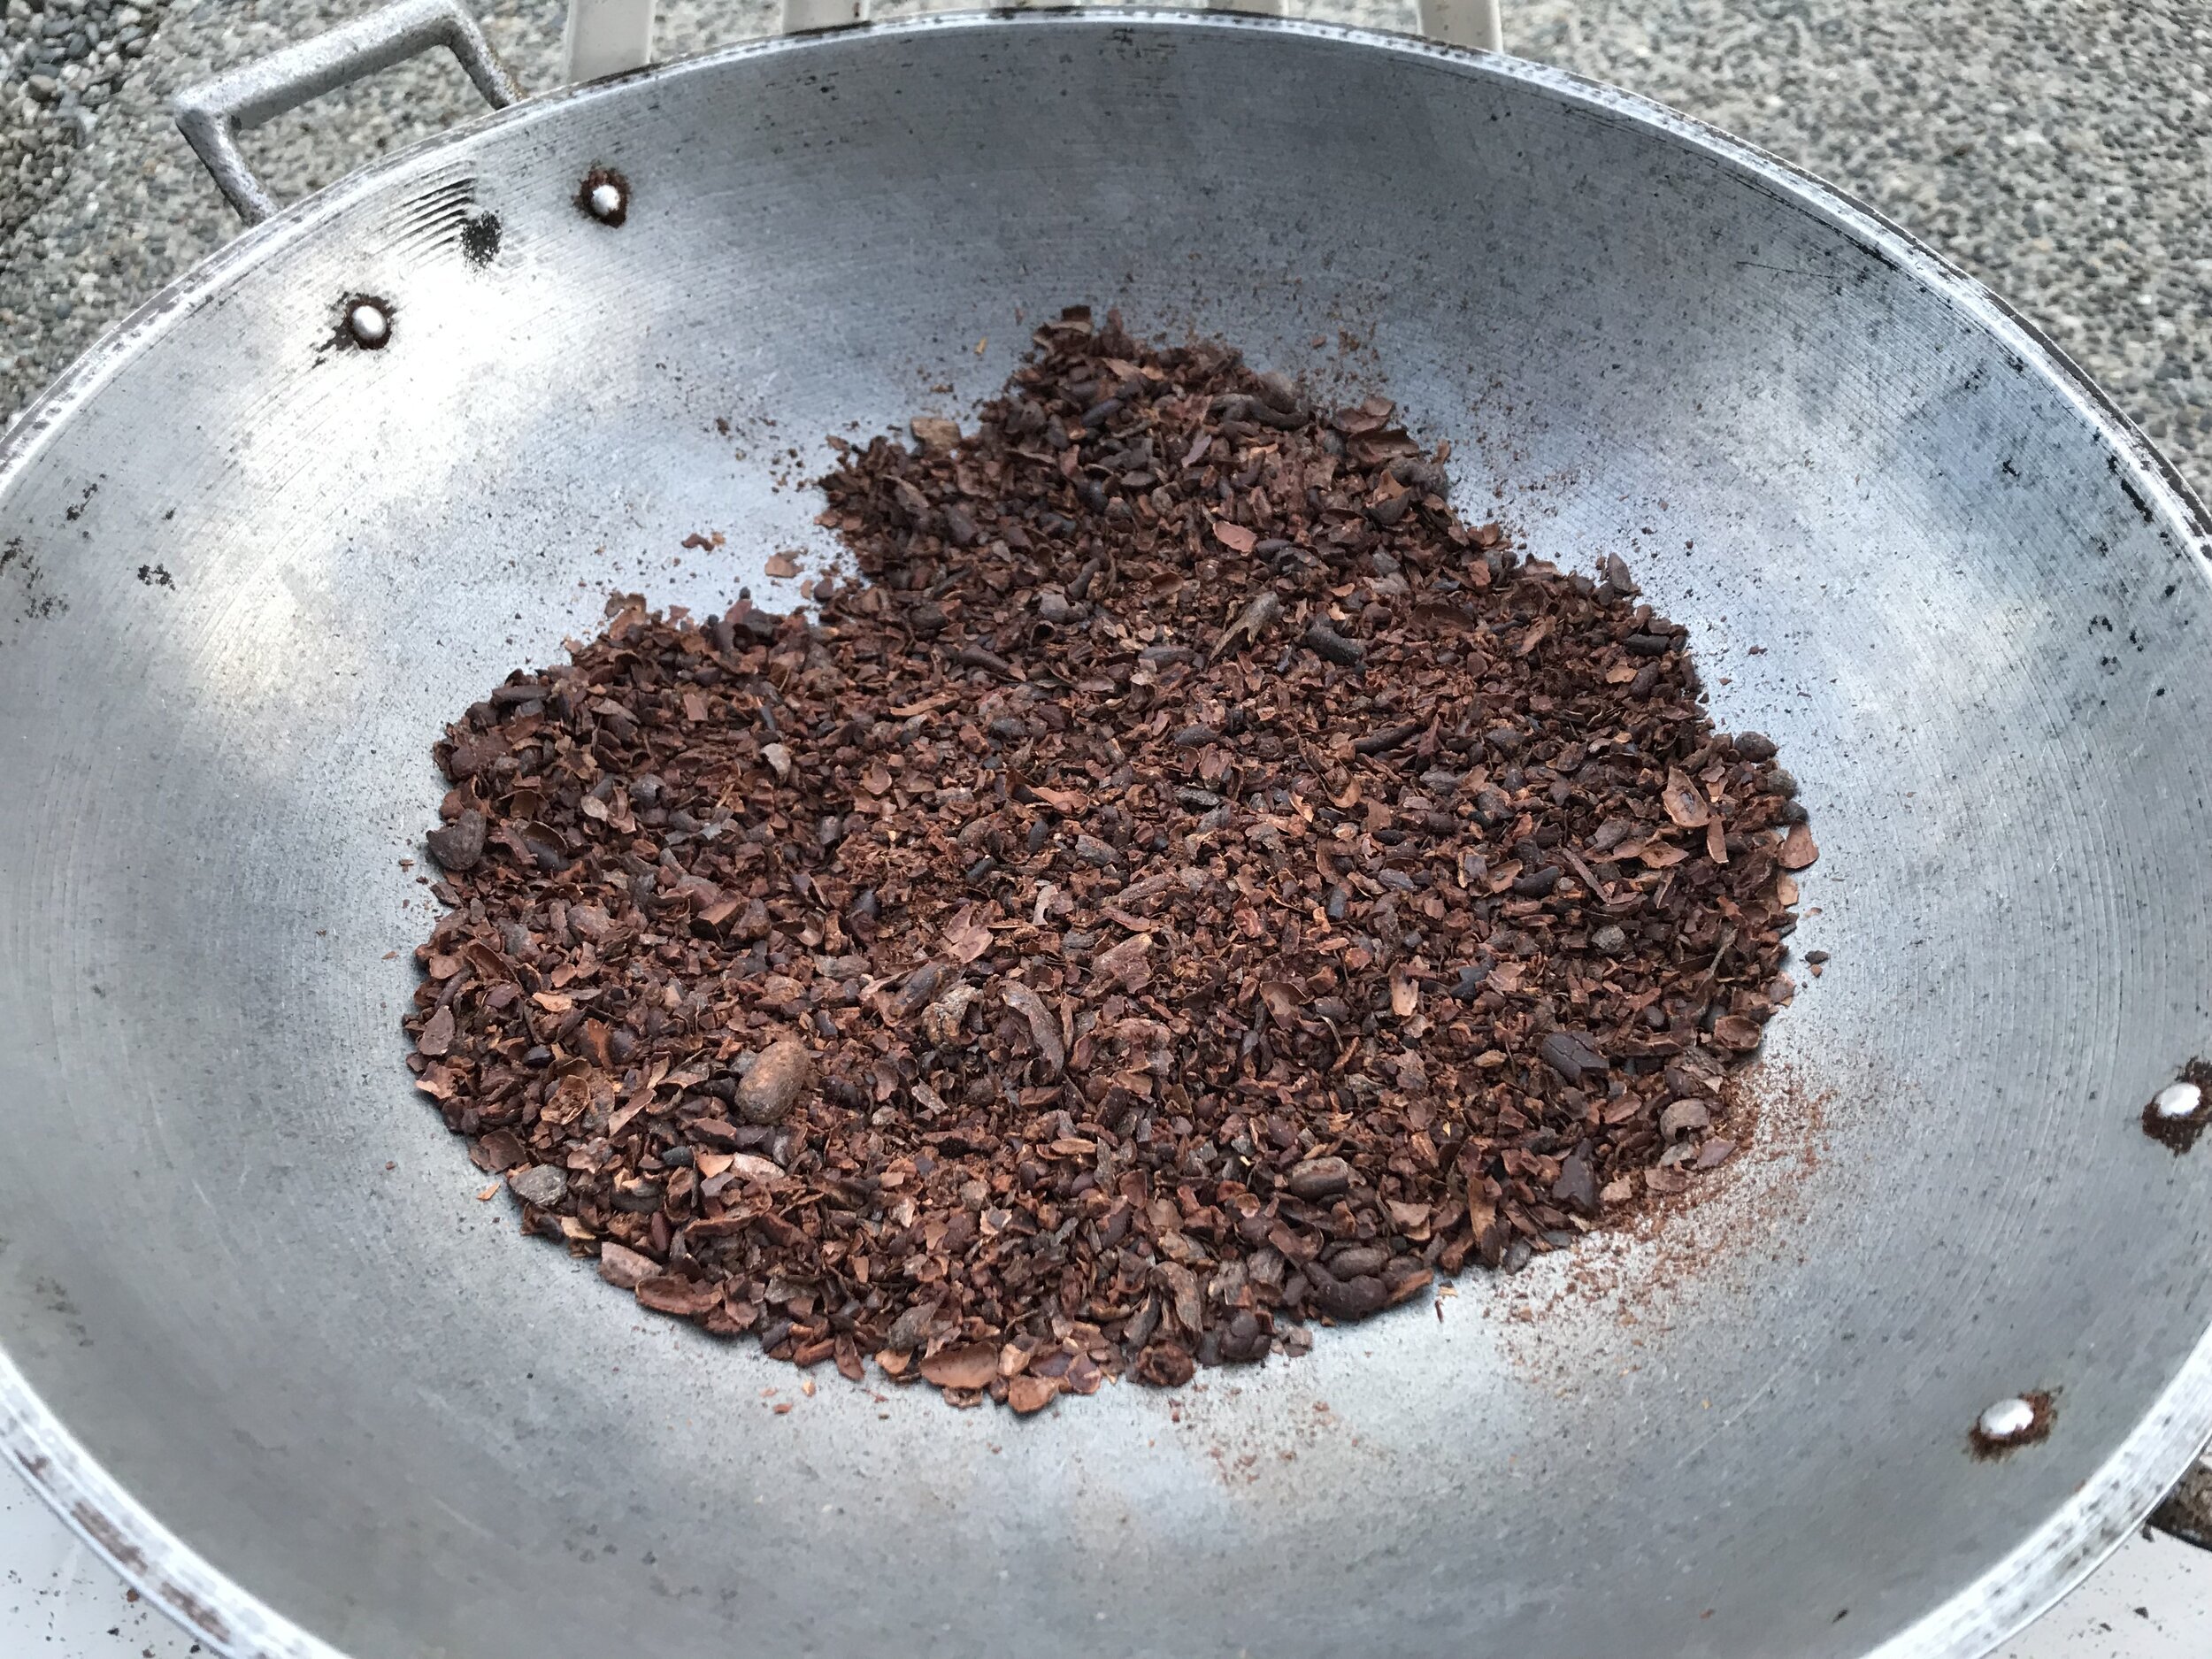
Next, take a large, wide-rimmed, shallow bowl and place a few handfuls of this mixture into the bowl. You don’t want to add too much, or much of the husks will get trapped during the process. The less you add, the better it will be, but the longer it will take to winnow.
Use a new hair dryer, face it into the middle of the mixture in the bowl, turn it on, and blow away the husks. While you are doing this, use your hand to mix the mixture and expose as much of the husk as possible.
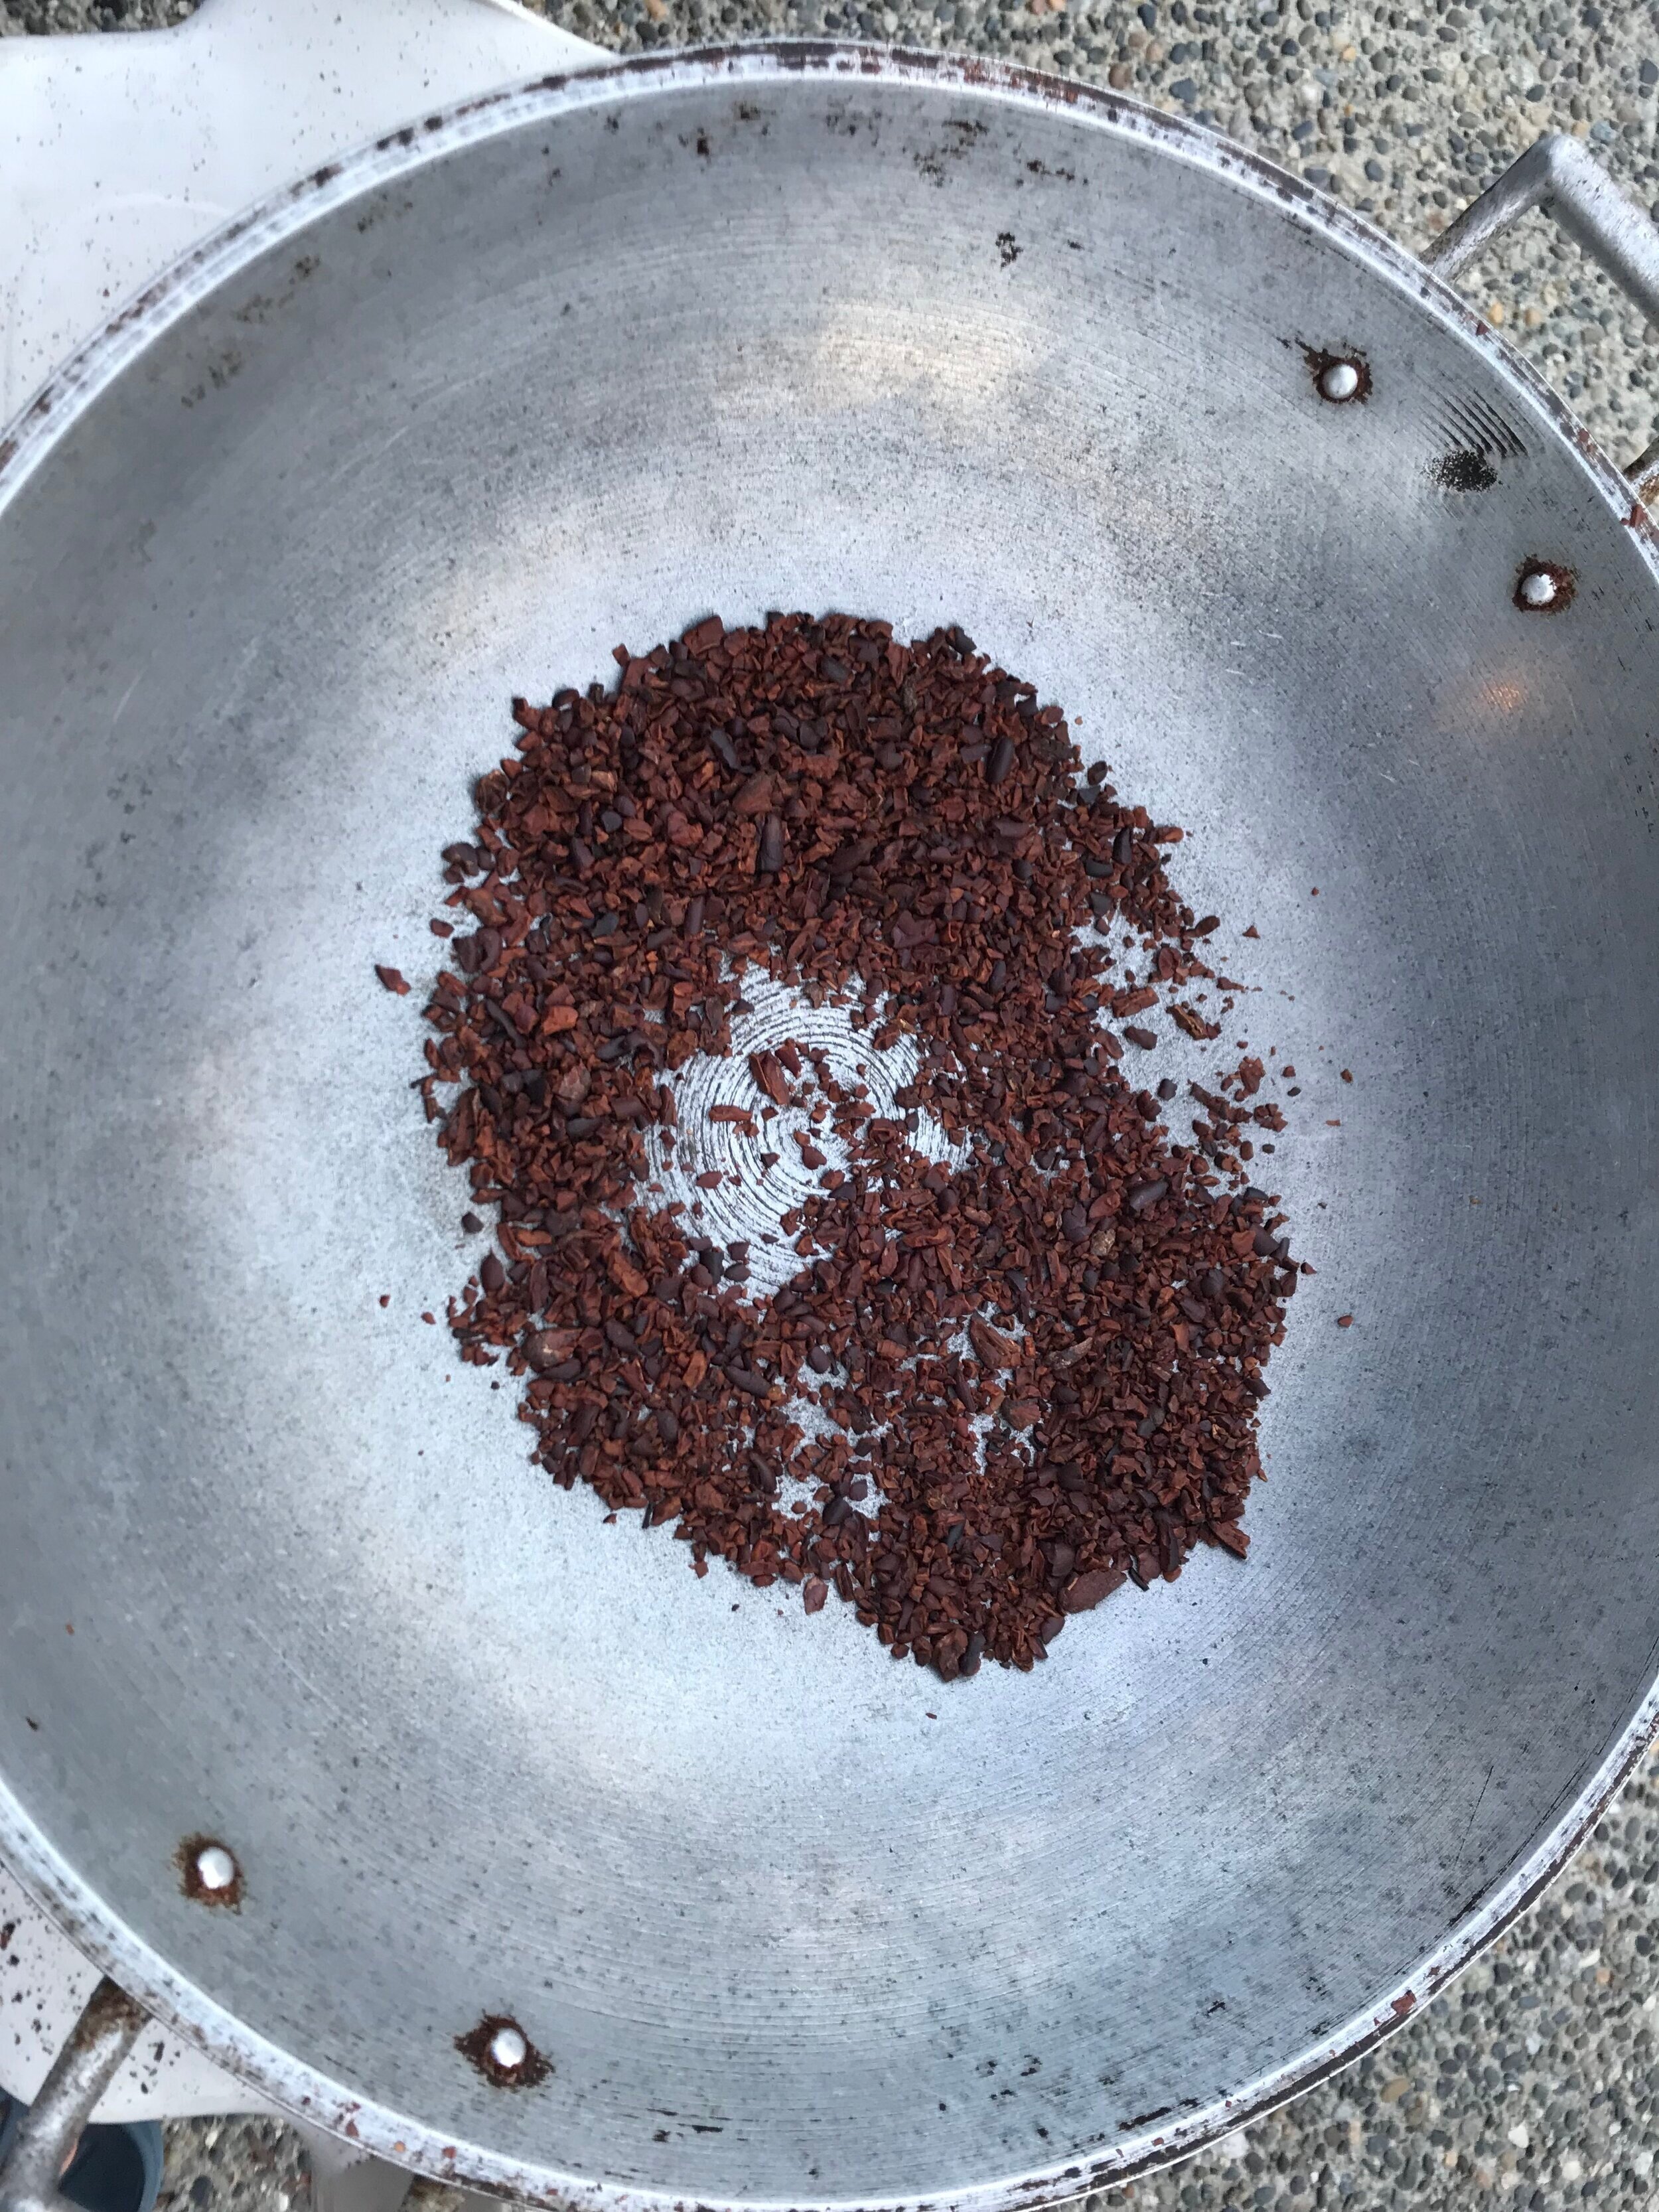
The husks will escape the bowl and fall onto the surrounding floor. Once you feel enough husks have escaped, take out the nibs and place them in a separate container or bowl. You don’t remove ALL the husks, but you’ll do a final sort through later on.
I also like to transfer my winnowed nibs into a mesh strainer, shake it, and remove residual husk dust left behind.
Repeat this processes until all your nibs are done.
Once all the cracked nibs are winnowed, lay them on a flat surface, and sort through them one last time removing any big chunks of husks or nibs with the husk still attached, and discard. The more effective you become in cracking and winnowing, the less you will have to sort later on.
It’s helpful to weight your cacao beans before cracking and after winnowing to get an idea of how much you are wasting. It’s normal to lose up to 30% of the weight after winnowing in this manner. Using a winnowing machine may reduce this to 20-25%.
Winnower Method:
Whether you are using a professional winnower or a DIY winnowing machine, the method is pretty much the same. Some will crack the cacao for you, so you just place your cacao beans within the machine and it does all the work. You will still have to quickly sort through your winnowed nibs, but they should be much more clean than doing it by hand using a hair dryer.
If your winnower doesn’t have a cracking apparatus involved, you will just have to crack it as you would above, then put the mixture slowly into the winnower and watch it remove the husks.
Most winnowing machines work by dropping the mixture down a shaft. As the husks and nibs fall, a vacuum sucks the lighter husks away, while the heavier nibs fall to the bottom.
Check out the bean to bar manufacturers on the Bean To Bar World Map to see if they sell any winnowing machines, or use a search engine to search “DIY winnowing machine”.
Refining
Refining, grinding, melanging… these terms are used interchangeably to mean the same thing: turning your nibs into chocolate!
This is part you’ve been waiting for. It seems like you’ve already done so much work to get here, but don’t fret, the machine will take care of the rest. All you need to go is offer up some TLC and taste as the wet-grinder does all the work.
For thousands of years, people had to grind by hand for hours upon hours on a stone table. Lucky for you, chocolate technology has come a long way, yet still works very simply.
A wet grinder has two stone rollers that move constantly to grind and heat up the mixture into delicious liquid chocolate. The flavour profile will change over time as the friction and movement will allow certain aromas (particularly acidic and harsh ones) to escape, and leave behind the more favorable aromas such as fruit, nut, and spice.
However, don’t over refine. Grinding for too long, 4-5 days + will force even the favorable aromas to escape, leaving a very flat, yet still tasty, chocolate. As a bean to bar maker, your goal is to get rid of the unfavorable aromas and keep the ones you love while obtaining the smoothness you desire.
How refining impacts your Chocolate
Using a wet grinder will greatly alter the flavour profile of the nibs as they become chocolate. There are some flavours within the nibs (favorable and unfavorable) that may get lost during the process of chocolate making. There are also some flavours that will be enhanced and more pronounced, especially after you add sugar. Although the machine is doing all the work, controlling the time will greatly impact the flavour profile of your final product.
The longer you grind, the more smooth the chocolate becomes. However, the flavour profile will change from 12 to 24 to 48 to 72 hours. Perhaps you love the flavour at 48 hours, but the texture isn’t quite as creamy or smooth as you like. It’s up to you to decide sacrifice some flavour for texture, or keep the texture where it’s at to conserve the flavour you love so much. Here are a few aspects that impact the chocolate.
Movement: The constant movement and grinding is cracking open the cells within the kernel/nib of the cacao. As the cells break, fat is released, is liquefied from the heat, and coats all the broken particles. Both the fat and the particles (AKA “cocoa solids”) contain the aromas. The constant movement exposes these aromas into the air, and they begin to fill the room.
You will begin to smell these escaped aromas as the aroma of chocolate fills the room. However, much of the acetic acid and other aroma molecules from the fermentation process also escape, and some say the smell of freshly ground nibs can also smell like feet or a wet dog (it depends on the beans and also how you as an individual perceive the aromas). Don’t fret if it does, as the chocolate can still be delicious.
Movement will really help allow these harsh aromas to escape from the nibs, into the air, and out of your chocolate.
Temperature: Adding heat during the addition of nibs, the heat from the friction of grinding, and any heat you may add during refining may impact the flavour as well, both good or bad. The volatile (small and light in weight) aroma molecules are sensitive to heat, and will move around more if heated up. This is why it’s harder to smell with a very cold nose in the winter.
Time: It’s important, especially as a beginner, to taste your chocolate as much as you can while the grinder is working. With time, the flavour profile of the chocolate will evolve while the chocolate gets smooth as well. I often taste around 4, 6, 12, 24, 36, 48, and 72 hours and even sometimes in between. As a beginner, it’s helpful to take out a few spoonfuls of chocolate at different intervals, put them aside, then taste them all after your chocolate is done to really “see” the flavour evolution of your chocolate.
You may also want to over refine a small amount to see how flat the flavour becomes if you grind for 4-5 days or more.
Playing around with the time of your refining is a huge step in the flavour evolution, and a fun part of being a bean to bar chocolate maker! Have fun with it.
Below is a method for wet-grinding, and some pointers if you want to play around with some other less refined methods of making a more rustic chocolate with equipment you may already have at home.
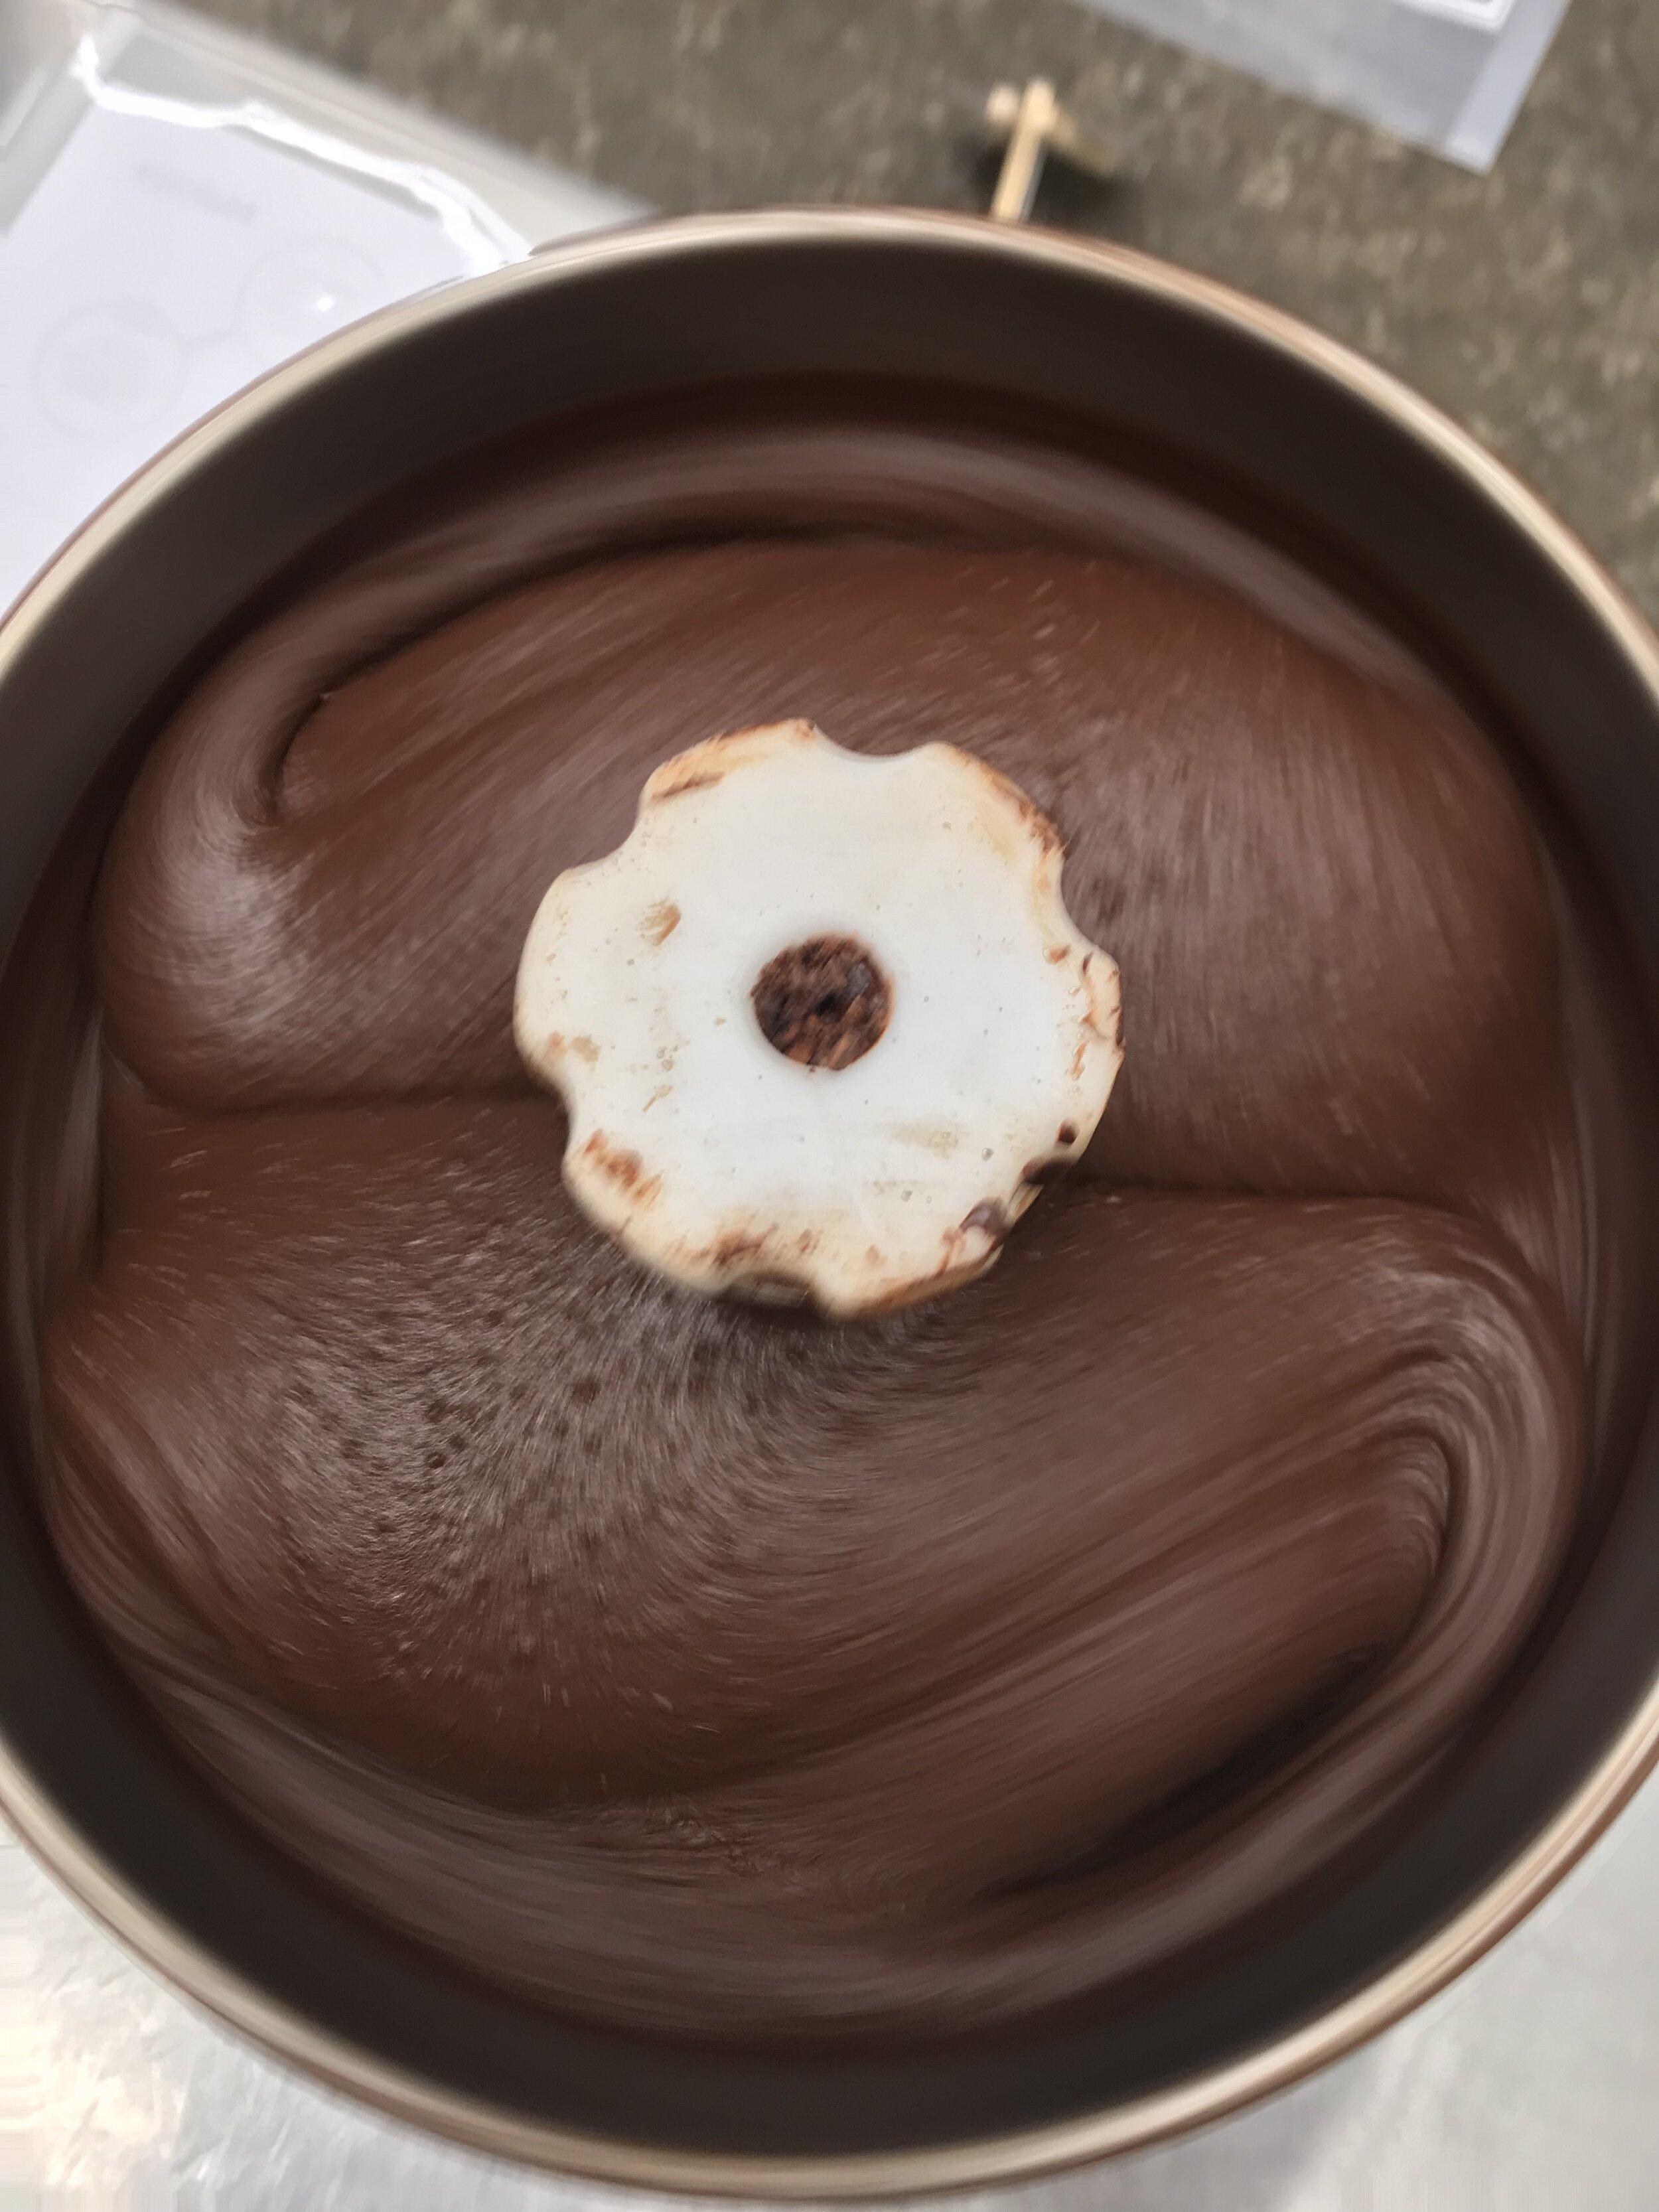
Wet grinding
Always follow the instructions given to you by the manufacturer of your wet-grinder/melanger including preparing, using, and cleaning. Below is a method that works well for smaller tabletop wet-grinders. See “Equipment” for where you can find a manufacturer near you.
NOTE: Never start your grinder without some nibs/chocolate/cocoa butter in it, as the rubbing of stone on stone may damage the equipment. Always make sure your stones and all the equipment is completely dry and free of water droplets. Allow it to dry overnight if you recently washed it. Also, if it’s your first time using it, read the manual for how to clean/prepare it before you start. It normally consists of using cocoa butter and letting it run a few hours, and discarding that cocoa butter before proceeding to wash and dry it.
Pre-grind Nibs: Your nibs are roasted, winnowed, and sorted. You can place the nibs directly into the melanger, but for smaller wet grinders especially it may do the equipment good to pre-grind your the nibs in order to put less strain on the gears and belt of the melanger. Again, you don’t have to, but if you plan to make chocolate often with your wet-grinder, I suggest pre-grinding. Ways to pre-grind your nibs include:
Food processor (not a blender) or magic bullet can do the trick. Fill the container about 1/3 and pulse until the nibs turn into tiny bits. If you blend too long, they will begin to get gummy and stick into clumps. You just want to create a course sand like texture. I have had success with a magic bullet, but you do need to shake it up and down/side to side while it’s blending.
Juicer is another piece of equipment you may have at home. Not all juicers may do the trick, but a champion juicer has proven effective. It will help to warm up the nibs beforehand if you can, slowly drop some in the feeding chute while using the pusher to slowly push the cacao through. It will come through on the other end as a thick paste that looks like thick brownie batter.
Mortar & Pestle will be time consuming, but if you have a large one, you can throw your nibs in and quickly grind them a bit smaller, although you may not get them as small as you would with a food processor. You also run the risk of much of it turning into a paste and getting stuck to the side of the mortar.
Warm up your nibs and the wet-grinder stones.
Preheat your oven to the lowest possible temperature, and lay your pre-ground nibs on a tray or in an oven safe bowl (although you may have to mix them in the bowl to warm them evenly), and warm up until they are warm to the touch. They shouldn’t be too hot, and definitely don’t roast them again!
Use your chocolate-dedicated hair dryer or a heat gun to warm the stones of your melanger. Be sure not to warm the plastic parts directly, and BE SURE to ensure your heat gun is not on high, you don’t want to melt any plastic parts such as washers and such. Do this when your nibs are already warm and you’re ready to start grinding!
Add in a handful or so of warm, pre-ground nibs and turn on the melanger. At this point, you want to add a handful or two at a time, waiting 5-10 minutes in between each addition while warming the stones/nibs with your hair dryer/heat gun. You want to see your nibs turn into a thick wet paste before you add more nibs. I recommend using a timer and setting it for 10 minutes, so you can do something else while you wait to add more nibs.
Adding too many nibs at once will strain the machine. You don’t wan to hear the machine strain or see the stones get stuck and stop rolling. If they do, turn it off, move away some of the nibs from under the stone, warm them up more, and turn it back on.
As you add more nibs, the amount of liquid chocolate will eventually be enough where you don’t have to keep warming the entire time, and you may be able to add a more nibs at a time. However, don’t push it! Take your time, watch and listen to your machine. I find this point is usually around the halfway mark. Some makers will warm until all the nibs are in. It’s up to you. This has more to do with taking care of the equipment than the flavour of the nibs, but heating the nibs certainly may burn off some acidity or alter the flavour to a degree. There is another piece of equipment for professionals called a conche, will grinds and heats up the liquid chocolate in order to alter the flavour, so heat definitely plays a small part in that.
Even after you begin adding heat, you will notice your chocolate will remain warm for the duration of the refining process. It’s normal for the refiner to be warm to the touch, especially if it’s full, and even reach about 70-80°F.
To lid or not to lid? You’re refiner comes with a lid. It may be helpful to keep this on at the beginning between additions of nibs, since the thick nib paste may shoot out of the melanger and onto the walls if you’re not careful. You’ll know what I mean once you start!
That said, keeping the lid on may also impact the flavour of your chocolate to a degree. Keeping the lid off, especially for the first few yours, will allow much of the harsh acidic aromas to escape, which is what you want. Later on, you may want to keep the lid on to keep the mixture warm, and keep it safe from foreign materials getting in. It’s something worth playing around with. If you find your chocolate is very harsh and acidic, keeping the lid off for the first few hours/day may help reduce it to a degree.
Sugar! Read the ingredients section to see what kind of sugar you can add.
Add your sugar after all the nibs have been added, and after it has liquefied. Some makers add the sugar the next day. Sugar is lipophyilic, meaning the sugar and cocoa butter do not like each other. Therefore, the sugar will greatly thicken the chocolate mixture as they attempt to avoid each other (in a way). Add the sugar in increments, and allow enough time in between before adding more. Adding too much all at once will put too much strain on your machine
This is why some makers add extra cocoa butter (about 5-8% of the entire weight of the mixture) to make the chocolate thinner and creamier. If you plan to mold your chocolate into bars or shapes later, the extra cocoa butter will make this much easier. If you are using your chocolate for drinks or to add to other recipes, the cocoa butter may not be necessary.
Adding too much cocoa butter will impact the flavour, even if its non deodorized, so be careful not to add too much. You can add it around the same time you add the sugar, either before, during, or after.
The amount of sugar is up to you. As a general rule from a tasting perspective, a chocolate percentage range of 65-75% is a good range for optimizing the fine aromas within plain dark chocolate. Too much sugar will mask these flavours, and too little chocolate will make it difficult to experience these flavours as the intensity of the cacao will make it difficult to detect them.
Percentage is a reflection of cacao bean to other ingredients, or in the case of dark chocolate, cacao beans to sugar. A 70% dark chocolate is made with 70% cacao nibs and 30% sugar. The more sugar you add, the thicker the mixture will become.
Stop & Scrape: You may want to periodically stop and scrape down your refiner where you see pieces of nibs or sugar crystals that haven’t bee incorporated. Don’t do this while the machine is in use. Use a rubber spatula to scrape the sides of the bowls, the inside of the stone wheels, and the center shaft.
Refining Time: This is up to you. Generally, most refine for 48-72 hours (2-3 days). A small tabletop refiner is said to use about the same amount of electricity as a light bulb. Ensure its in a room that you don’t mind the sound or smell coming from the refiner.
As mentioned earlier, time not only impacts the texture (smoothness) but also the flavour profile of your chocolate.
The time is also dependent on the amount of cacao nibs and the size of your melanger. The more full, or the larger the grinder, the more time it may need to reach the same smoothness/flavour as a smaller amount/sized machine.
If you actually want a more course/unrefined chocolate, or really love the taste of the nibs and don’t want to alter them too much, you can refine for only 12-24 hours as well. It’s really up to your preference and what you are trying to achieve.
Other Grinding Methods:
Food Processor:
If you do want to try using a food processor, you will want to roast your cacao, remove the shells, and then warm up the nibs in the oven. Grind them while they are still warm until it forms into a paste. Once they liquefy, you can add your sugar and continue to blend. You may want to add some extra warm cocoa butter to help the process along and make the mixture less thick, but it’s not necessary.
Juicer
In the same way as using a food processor, peel the husks off your roasted cacao beans, and then warm the nibs. Add the warm nibs through the food processor using the tamper (food pusher).
Mortar And Pestle
Warm up your mortar and pestle, warm up your nibs, and grind away until they turn into a paste. You can use a heat gun or hair dryer to warm your paste and mortar and pestle as you grind to help the processes along. You can add a little sugar as well to sweeten it up after the nibs have turned into a paste.
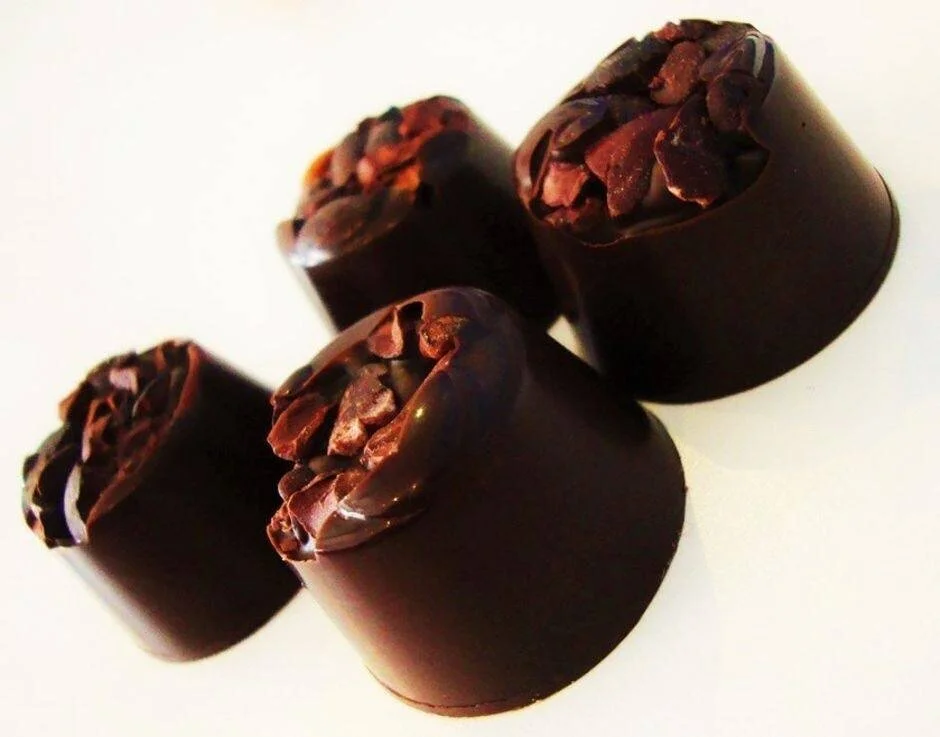
Pouring & Aging

Pouring
All done? When you’re happy with the taste and texture of your chocolate, time to turn off your melanger. Unscrew the bolt or however you are supposed to remove the stones. Place the stones on a tray with some parchment, and scrape off as much as you can. You may want to wear gloves as this can get messy.
Pour the rest of the chocolate from the chamber out as well. You may want to pour all your chocolate through a fine mesh strainer if you’re picky about not having any bits of nibs or sugar crystals in there. If you don’t mind a few, no need to strain it. It’s also beneficial to strain if you plan to the chocolate just to ensure there isn’t some foreign object in it for some odd reason.
You can pour it into a tray with parchment, or into a clean empty metal hotel pan or metal bowl.
Aging
What is aging? Essentially it’s allowing your chocolate to rest for a few weeks or a few months. It’s not exactly known what happens during this time, and why the flavour changes. Some say oxidation, although there isn’t any evidence for the reason behind it.
You will notice that after a few weeks, the flavour you tasted in the melanger will change slightly, with some aroma notes getting weaker while others becoming more prominent.
Aging isn’t necessary, and some makers prefer not to age at all. It’s up to you! It’s worth trying though, and trying them at different stages of aging to see if you can notice any difference.
How to age: Simply keep your chocolate in the tray/pan/bowl, and cover it with saran wrap or newsprint. You can also place it into a cambro with the lid shut, a heavy duty resealable plastic bag, or even wrap it in a non-odorous paper and let it rest.
Ensure it sits somewhere cool, dry, and odor free. Not in a cold cellar, or anywhere perfumes or other strong odorous foods exist. The chocolate will easily absorb these aromas.
I have heard of people purposely allowing the chocolate to sit with odors spices or herbs to allow it to absorb that. The Europeans in the 17th Century even let their cocoa beans sit with jasmine flowers for days or weeks to allow them to absorb those aromas. Something fun to consider.
Tempering
Coming soon
I’ll dedicate another page to tempering 101. Tempering is only necessary if you plan to properly mold your chocolate into bars or shapes. If you plan to use it as an ingredient in baked goods, ganaches, or drinks, there is no need to tempering. Also, you can enjoy our untempered chocolate as is or melted.
Storing
You can store dark chocolate for years! The high levels of fat in dark chocolate, as well as the high levels of polyphenols (antioxidants) make it inhospitable for bacteria to grow.
So, you can store for years, but the flavour won’t last for years. If the chocolate is sealed in an airtight container or package, the flavour should be conserved for a year or two at least.
If the chocolate isn’t wrapped well, or just thrown in a cupboard, eventually the wonderful flavours you worked so hard to achieve will weaken, and it may absorb other surrounding odors.
It’s best to keep your chocolate in glass mason jars, or odor free plastic resealable containers. Try and eat it within a year or two.
Tasting
Now that you’ve made your chocolate, its important to learn how to taste fine chocolate like a pro. The more you taste, of your own, of others, the more seasoned you will be and the more discerning you will become. However, you need to start off with the right information to learn what to “taste” for.
Tasting 101
Learn Tips on Tasting Fine Chocolate
Bean To Bar Compass
The Chocolate Tasting Tool & Workbook
Need more help Making Chocolate?
I also offer affordable live video tutoring you can book from anywhere in the world!
This is prefect if you would like me to walk you through something in the kitchen and interact in real time!